Creating custom recipe cards can be a fun way to share favorite dishes with friends and family. Many people enjoy presenting their recipes in a visually appealing format.
Using Pixlr offers a simple way to design personalized recipe cards that can be printed or shared online.
With Pixlr, users can easily choose from various templates or start from scratch to make their cards unique. Adding images, colors, and personal touches makes the recipes stand out. This platform allows for creativity that turns a simple recipe into a cherished keepsake.
Those interested in crafting their own recipe cards will find this guide helpful. By following these steps, anyone can create beautiful cards that reflect their cooking style and personality.
Getting Started with Pixlr
Starting with Pixlr is simple and exciting. This tool provides great ways to create custom designs, perfect for projects like recipe cards.
Overview of Pixlr Tools
Pixlr offers a range of intuitive tools to help users design effectively.
Key tools include:
- Brush Tool: Great for drawing and adding personal touches.
- Eraser Tool: Allows for corrections and adjustments.
- Text Tool: Essential for adding recipe titles and instructions.
- Shape Tool: Useful for creating borders or background shapes.
Each tool is easy to locate in the toolbar and can be adjusted for size and opacity. Users can experiment with these options to find what best suits their design needs.
Setting Up Your Workspace
Setting up the workspace in Pixlr is the first step to a great project.
When users open Pixlr, they can create a new document by selecting the size they want. For recipe cards, a standard size like 4×6 inches works well.
Next, it is important to customize the layout.
Users can access the Layers Panel to manage their design elements. This allows for easy adjustments and organization.
To create a comfortable working environment, users can also enable or disable grid lines. This helps align elements neatly. Adjusting the zoom level gives better control when placing details.
With a well-set workspace, users can dive into creating beautiful recipe cards.
Designing Your Recipe Card
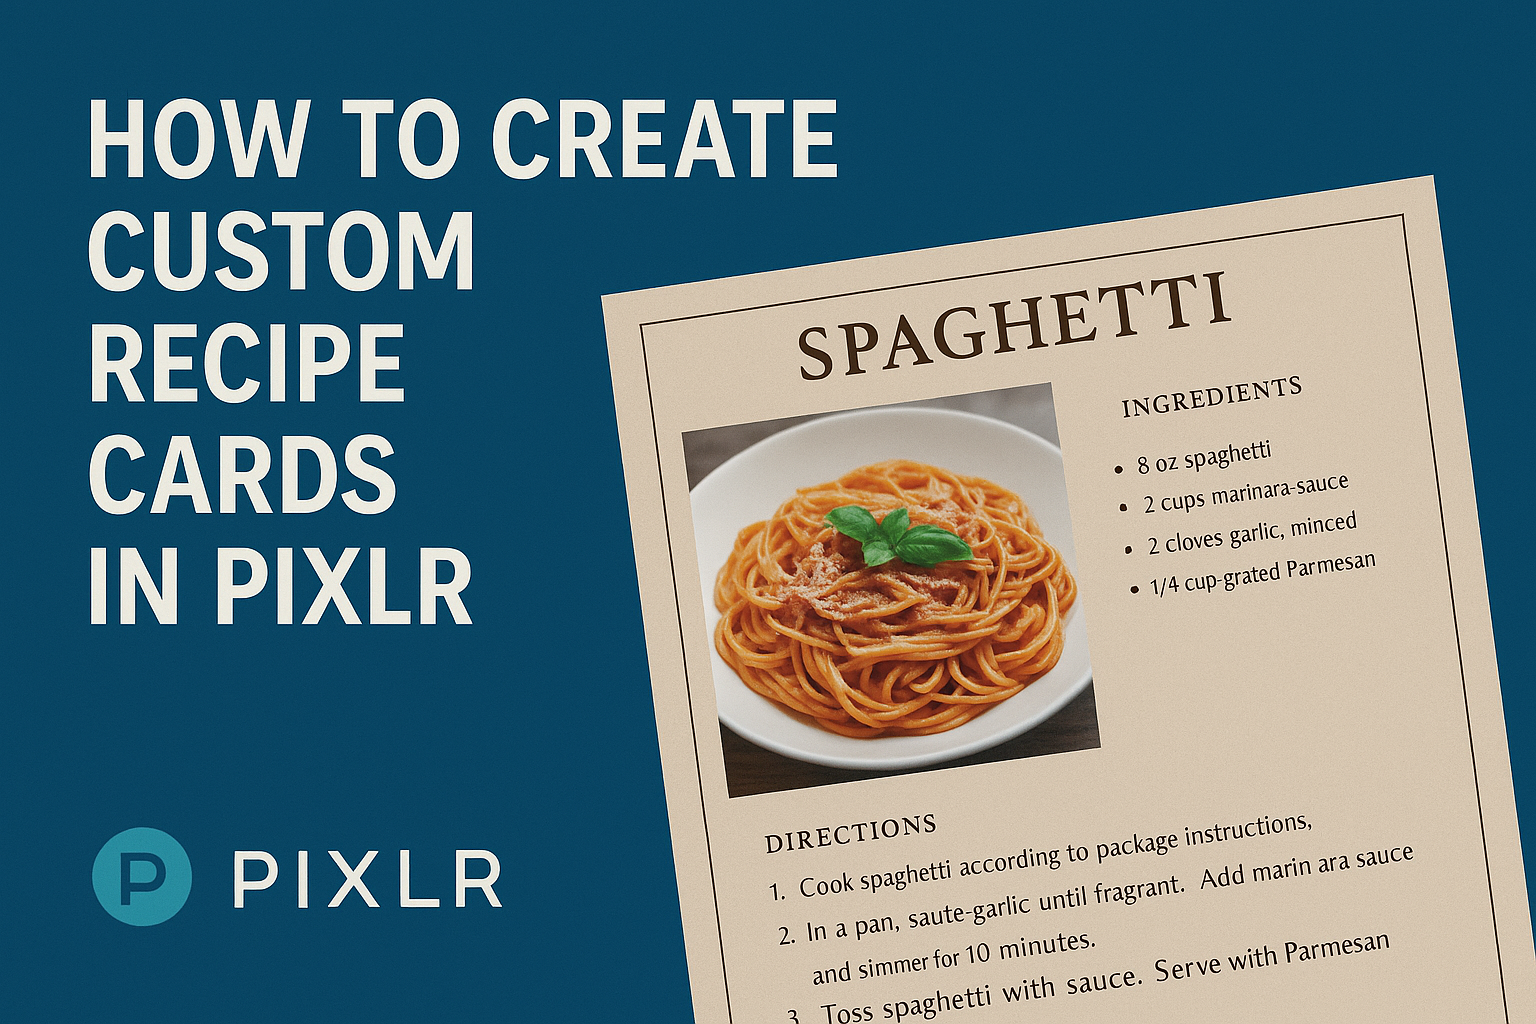
Creating an attractive recipe card requires careful planning. Attention to layout, color, and typography will help ensure the recipe card is both functional and visually appealing. Here are the key aspects to focus on when designing a recipe card.
Choosing a Card Layout
When designing a recipe card, the layout is essential. A well-organized card makes it easy to read and find information.
-
Standard Sizes: Common sizes for recipe cards are 4×6 inches and 5×7 inches. These sizes fit well in recipe boxes or can be easily printed.
-
Sections: Divide the card into clear sections such as ingredients, instructions, and notes. This helps anyone using the card find the information quickly.
-
Visual Balance: Leave enough white space around text and images to avoid a cluttered appearance. This makes the card easier on the eyes and more inviting.
Selecting a Color Scheme
Color can greatly influence the mood of a recipe card. Choosing the right color scheme enhances the card’s appeal.
-
Theme: Consider the recipe’s theme or cuisine. Warm colors like reds and oranges work well for spicy dishes, while cool colors like blues and greens are great for refreshing salads.
-
Contrast: Ensure there is enough contrast between text and background. Dark text on a light background is easier to read and looks professional.
-
Consistency: Pick a color palette of 2-3 complementary colors. This keeps the design cohesive and visually appealing.
Adding Text and Typography
Text and typography play a significant role in how the recipe card communicates information.
-
Font Choices: Use clear, legible fonts for easy reading. A combination of a bold font for headings and a simpler font for instructions works well.
-
Size and Hierarchy: Make headings larger than the body text to create a visual hierarchy. This helps guide the reader’s eye to the most important information first.
-
Emphasis: Use bold or italics to highlight key ingredients or steps. This draws attention to critical parts of the recipe and helps prevent mistakes while cooking.
Customizing with Images and Graphics
Adding images and graphics to recipe cards can make them visually appealing. Using the right visuals allows personalization and helps convey the recipe’s essence more effectively.
Inserting Images
To start, Pixlr makes it easy to insert images into recipe cards.
-
Upload Images: Click on the “Upload” button. This will allow the user to select images from their device.
-
Drag and Drop: Users can simply drag images onto the canvas which makes placement quick and intuitive.
-
Adjust Size: Resize the images by clicking and dragging corners. This helps in fitting images perfectly within the design.
Positioning images correctly enhances the overall look of the recipe card. Make sure to leave ample space for text and other elements to avoid a cluttered appearance.
Using Filters and Effects
Applying filters and effects can greatly enhance images. Pixlr offers a variety of options for users to experiment with.
-
Choose a Filter: After selecting an image, click on the “Filter” menu and choose the desired effect. Options include brightness, contrast, and vintage styles.
-
Layer Effects: In addition to basic filters, users can apply layer effects. This can add depth or a unique touch to the images.
-
Fine-Tuning: Most filters allow adjustments. Users can tweak the intensity to suit their preferences.
Saving and Sharing Your Creation
After designing a custom recipe card in Pixlr, it’s time to save and share it. Knowing the right export options and printing tips will help ensure the recipe card looks great.
Exporting Your Recipe Card
To save the recipe card, the user should first click on “File” in the top menu, then select “Export.”
Pixlr provides several format options, including JPEG, PNG, and TIFF. Each format serves a different purpose.
- JPEG is best for emails and online sharing due to its smaller file size.
- PNG is ideal if the card includes text or needs a transparent background.
- TIFF is perfect for high-quality prints.
Choosing the right format is essential for ensuring that the recipe card maintains its quality when shared or printed. After selecting the desired format, the user should name the file and select the destination folder before clicking “Save.”
Tips for Printing
When printing the recipe card, it’s important to use quality paper. A thicker cardstock can make the card feel more professional.
Before printing, check the following:
- Print settings: Ensure the printer settings match the card size.
- Quality settings: Opt for high-quality print settings for the best results.
For an extra touch, users can consider using a color printer to capture the vibrant designs. After printing, cutting the cards accurately can enhance their overall appearance.
By following these tips, the user can create a beautiful, easy-to-read recipe card ready for any kitchen.