CorelDRAW’s interactive tools offer designers a new level of creativity and efficiency. These tools allow users to manipulate graphics with precision, enhancing their designs with ease.
From creating vibrant gradients to using macro scripts for animation, CorelDRAW provides a wide range of features. The software supports intricate design work, making it ideal for both beginners and advanced users alike. With its advanced drawing tools, CorelDRAW opens up countless possibilities for creative expression.
Whether it’s through the use of shape, crop, or artistic media tools, designers can push their creativity further. The platform is also perfect for exploring digital export formats like PDF and PNG. Learning these interactive features can greatly enhance one’s design projects and streamline the creative process.
Understanding Interactive Tools Basics
Interactive tools in CorelDRAW allow designers to enhance graphics with effects like shadows, blends, and contours. Mastering these tools can elevate design skills, making it easier to create striking images.
Exploring the Interactive Toolset
CorelDRAW offers a variety of interactive tools that add layers and depth to designs. Drop shadow, blend, contour, and extrude tools are some of the key features available. These can give a flat object a 3D appearance or merge different shapes smoothly.
The drop shadow tool is used to create shadows behind objects, adding depth and realism. The blend tool helps in merging two different shapes, creating intermediate steps between them.
The contour tool adds multiple outlines around an object, which can be adjusted to create different effects. Each tool has specific settings that can be customized in the Property Bar, providing flexibility in use. Understanding these settings is crucial to fully utilize the toolset for diverse design needs.
Setting Up Your Workspace for Interactive Tasks
Before diving into interactive tasks, setting up the workspace is essential. A well-organized workspace increases productivity and allows for easier access to tools. CorelDRAW provides customizable layouts to suit individual preferences.
Placing frequently used tools and palettes within easy reach speeds up workflow. Designers should also ensure their workspace is clutter-free to avoid distractions. Utilizing CorelDRAW’s docking features helps keep the tools visible without taking up too much space on the screen.
Grouping related palettes together can minimize the need to switch between different tabs. Paying attention to these details creates a more efficient environment for using interactive tools effectively.
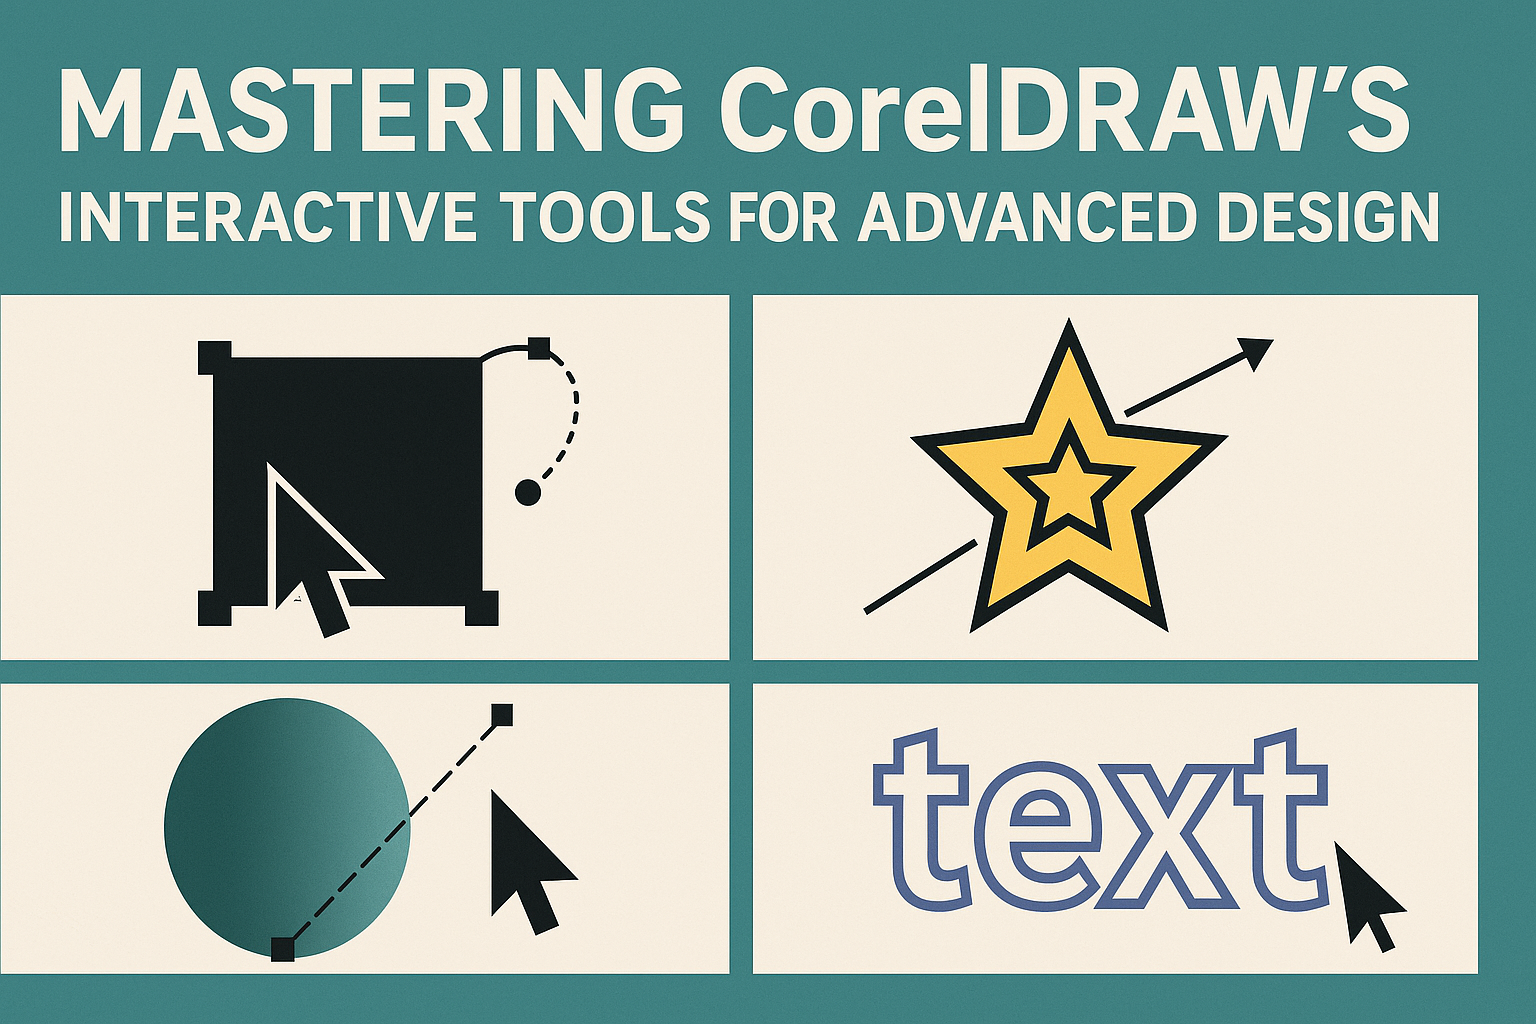
Mastering the Interactive Selection Tools
Unlocking the potential of CorelDRAW’s interactive tools can greatly enhance design projects. These tools provide flexibility and innovation in image manipulation, allowing designers to craft unique visual elements with ease and precision.
The Smart Fill Tool
The Smart Fill Tool is a dynamic feature in CorelDRAW. It allows users to quickly fill specific areas with colors, making it ideal for coloring complex shapes or sections within a design. When activated, the tool identifies closed paths and applies the chosen color to that space.
This tool enhances productivity by reducing the time spent on manual filling. Users can select from a wide range of color palettes to suit their designs. The Smart Fill Tool also supports gradient fills, adding depth and dimension. Experimenting with different hues and effects can produce striking results. This flexibility transforms intricate sketches into lively artworks.
Interactive Distortion and Drop Shadow
CorelDRAW’s Interactive Distortion Tool lets designers morph objects and create exciting visual effects. This tool supports unique transformations like push and pull distortions, which can add drama or subtlety as needed. Meanwhile, the Drop Shadow Tool is perfect for adding depth and realism to elements, creating the illusion of three-dimensional space.
With options to adjust transparency, direction, and feathering, users have control over how shadows appear. Designers can add emphasis or texture to their compositions. Combining these interactive tools with CorelDRAW’s diverse features can convert 2-D objects into 3-D. This combination of tools can elevate artwork, making it visually engaging and professional.
Advanced Vector Editing Techniques
When diving into advanced vector editing in CorelDRAW, learning to use tools like the Interactive Envelope Tool, the Mesh Fill Tool, and advanced node editing is crucial. These tools help designers create intricate and precise designs with ease.
Using the Interactive Envelope Tool
The Interactive Envelope Tool allows designers to distort and reshape objects by applying an envelope shape to them. This tool is particularly useful to create custom letter forms or fit text into complex shapes.
To use it, select the object, activate the tool, and drag the envelope nodes to achieve the desired effect.
The tool supports both straight and curved node types, providing flexibility in shaping. Designers must experiment with node adjustments to perfect the curves and lines, which brings creativity into their work.
Creating Complex Shapes with the Mesh Fill Tool
Creating complex shapes in CorelDRAW is made possible by the Mesh Fill Tool, which lets designers create gradients within an object. This tool adds depth and dimension, enhancing the realism of an image.
Designers apply a mesh grid over an object, then adjust colors at grid points. This creates detailed shading and highlights. It requires practice, but it’s key for adding volume to flat colors.
Mesh Fill can transform simple vector shapes into detailed illustrations, which is beneficial in digital art and design.
Advanced Node Editing
Advanced node editing is where precision and detail come together. By manipulating individual nodes on a vector path, designers can refine shapes to their liking. This skill is crucial for tasks like cleaning up curves and adjusting paths.
CorelDRAW offers several node editing options like adding, deleting, or converting nodes from smooth to cusp. This allows for more controlled and clean edits. Through practice, designers can create fluid and polished vector graphics.
In mastering node editing, it’s important to frequently zoom in and out, observing how changes affect the overall object form. This detailed approach ensures accuracy and enhances the design outcome.
Effective Curve Manipulation
Effective curve manipulation in CorelDRAW involves using tools that allow the creation of smooth and precise curves for various design elements. This includes techniques for blending and contouring, which are essential for adding depth and detail to designs.
The Interactive Blend Tool
The Interactive Blend Tool in CorelDRAW is great for merging two shapes smoothly. This tool allows designers to create a series of intermediate shapes between two objects, giving the effect of gradual transition. It’s especially helpful when trying to create shading or color transitions between elements.
To use this tool, select the Blend Tool and click on the starting and ending objects. You can adjust the number of steps in the blend through the property bar, adding more steps to make a smoother transition or fewer for a more distinct effect. The blend path can also be manipulated to follow a specific curve or direction, providing additional creative control.
Experimenting with the Blend Tool can lead to dynamic and rich visuals, bringing a designer’s vision to life with ease.
Exploring the Contour Tool Capabilities
The Contour Tool helps add parallel interior or exterior lines to an object, enhancing its visual depth. Designers can apply this tool to shapes or text to create layers that add interest and complexity to their designs.
To apply a contour, select the object and then choose the Contour Tool. Options appear to customize the contour’s offset, direction, and number of steps. This flexibility allows users to create anything from subtle outlines to intricate patterns.
By adjusting the contour’s settings, designers can make more striking designs. Practicing with different contour levels can help find the perfect effect for any project, making this tool invaluable for complex design tasks.
Enhancing Visuals with Interactive Effects
To make designs pop, using interactive effects in CorelDRAW can transform flat designs into dynamic visuals. These tools can add depth, transparency, and realism to elevate design work.
Applying Interactive Transparencies
Interactive transparency is a powerful tool in CorelDRAW that lets designers create subtle or dramatic effects. By adjusting the transparency, users can make objects appear lighter or blend into the background. This technique is particularly useful for layering images, where the top layer can have a reduced opacity, allowing elements underneath to show through.
To use this feature, select the object and apply the transparency tool. Different modes, such as uniform or gradient, provide varying levels of visibility. Experimenting with transparency levels can produce varying effects, from soft shadowing to highlighting particular aspects of the design. This tool is ideal for fine-tuning how elements interact visually.
Interactive Extrude for Depth and Perspective
Creating a sense of depth in a digital landscape can be challenging. The interactive extrude tool offers a solution by adding three-dimensional aspects to objects. By pulling the edges of an object outward, designers can mimic the look of an object extending into space. This effect is valuable in giving flat illustrations a more dynamic appeal.
Extrude is especially handy for crafting logos or text with impact. It allows for control over the direction and length of the extrusion, giving designers flexibility in how they wish to present depth. The tool is not only practical for creating visual interest but also for giving graphics a professional edge.
Using the Interactive Shadow Tool for Realism
Shadows can make or break a realistic design. The interactive shadow tool in CorelDRAW steps up design work by adding believable shadows to objects. By adjusting parameters like offset, angle, and transparency, shadows create the illusion of an object being lifted off its surface.
Applying shadows need not be complex. A gentle, soft shadow can subtly enhance the realism without overpowering the focus object. Users can manipulate both the position and softness of the shadow, tailoring it to suit the scene’s lighting conditions. For anyone looking to add a touch of realism, mastering this tool is crucial.
Typography and Text Interactivity
Mastering text tools in CorelDRAW can greatly improve design projects. With interactive formatting, designers can quickly adjust text appearance, while creative text effects allow for unique visual presentations.
Interactive Text Formatting
CorelDRAW offers several interactive text formatting options that make adjusting text easy and efficient. Users can change font styles, sizes, and colors with just a few clicks. The Text Tool (F8) is essential for adding and editing text directly within designs. Designers can use the Pick Tool to select text and change properties like alignment, spacing, and indents.
Paragraph text offers more flexibility, allowing users to create columns, set line spacing, and align text perfectly. Working with interactive text features, such as drop-down menus, further streamlines formatting tasks. These tools make it possible to balance aesthetics with readability effectively.
Creative Text Effects with Interactive Tools
CorelDRAW’s suite of tools also includes features for applying creative text effects that add depth and style to lettering. The Fit Text to Path tool lets users mold text along curves and shapes, producing dynamic layouts. Designers often use this to follow the lines of logos or graphics creatively.
Text effects like shadows, outlines, and gradients can be applied to achieve specific visual outcomes. The Interactive Fill Tool enables the addition of vivid gradients, while the Drop Shadow Tool provides a realistic shadowing effect. By utilizing these interactive capabilities, text in CorelDRAW can seamlessly integrate into overall design themes, enhancing both engagement and visual appeal.
Optimizing Designs with Bitmap Interactivity
CorelDRAW offers exciting ways to work with bitmaps through interactive tools. These features can transform colors and mask parts of your bitmap images.
Bitmap Color Masking
Bitmap color masking allows designers to isolate and edit specific colors within an image. By using this tool, any unwanted color can be targeted and adjusted without affecting the whole image.
This is useful when modifying logos or cleaning up scanned images. Users can choose a color range, apply changes, and see real-time results. This process is non-destructive, meaning the original image remains intact. Designers often use color masking to enhance certain elements of a design, ensuring they standout.
Color masking can sometimes be a fiddly process, but the results are worth it. It saves time and provides more precise control over the image.
Applying Interactive Color Transforms
Interactive color transforms are another key tool in CorelDRAW for enhancing bitmap images. This feature lets users adjust brightness, contrast, and saturation dynamically on the screen.
Transformations like these help maintain quality while introducing creativity into the design. Designers can play around with different settings until they get the right look. The Interactive Bitmap Transparency Tool adds depth and texture, allowing images to blend seamlessly with other design elements.
Experimenting with these tools gives flexibility in design choices. This flexibility ensures that the final output meets the demands of both the designer and client. Adjusting each setting carefully can lead to captivating and professional results.
Workflow Essentials
Mastering CorelDRAW can be more efficient with a few key strategies. Customizing interactive tool properties helps tailor the software to suit specific design needs, while knowing shortcut keys boosts productivity by saving time.
Customizing Interactive Tool Properties
In CorelDRAW, interactive tools can be customized to fit the designer’s workflow. By adjusting properties like line thickness, color, and style directly within the tool settings, users can create a personalized design environment. Customization options can be found within the software by navigating to the property bar when any tool is selected.
For instance, the Interactive Fill Tool allows users to modify gradients with precision, adjusting colors and transition points easily. Designers can also save these settings as presets for future projects, ensuring consistency and efficiency.
Using the Interactive 3-D tool helps in converting 2D objects into realistic 3D forms. This customization enhances the design process by giving objects a more lifelike appearance, essential for detailed projects like technical illustrations or complex logos.
Shortcut Keys for Efficient Design
Shortcut keys in CorelDRAW streamline design tasks by providing quick access to commonly used functions. Becoming familiar with these keys can significantly reduce reliance on mouse navigation, making the design process much faster.
For example, using Ctrl + D duplicates objects instantly, while F8 activates the Text tool. These shortcuts minimize downtime, allowing designers to maintain momentum in their workflow.
Moreover, custom shortcuts can be created for unique commands. By exploring the hidden features, designers can uncover less-known shortcuts that suit their style. This adaptability is crucial for enhancing speed without sacrificing quality.
Practice Projects to Enhance Skills
Using interactive tools in CorelDRAW can significantly elevate design skills. Practice projects focused on designing logos, creating complex illustrations, and using tools in page layouts will help users become more adept and confident in their design abilities.
Designing Logos with Interactive Tools
Using CorelDRAW’s interactive tools can make logo design a more dynamic process. These tools allow designers to experiment with shapes and text in creative ways. By practicing with PowerClip, designers can effortlessly integrate images or text into existing shapes, creating unique logos.
Gradients and transparency can add depth and complexity, making logos stand out. Practicing these techniques helps in understanding how colors and layers interact.
Additionally, using the practice projects provided by CorelDRAW can be a great way to apply these skills in real-world scenarios.
Creating Complex Illustrations
CorelDRAW’s tools for creating complex illustrations are versatile and user-friendly. The use of vector effects and bitmap effects allows designers to add intricate details to their artwork. Practicing with these elements helps in achieving a polished and professional look.
For detailed illustrations, using layers is crucial. Closely working with multiple layers can enhance the precision of the final piece. Additionally, tools like the Interactive Fill tool provide designers with the ability to seamlessly blend different colors and textures.
These projects will sharpen skills and make them more confident in handling intricate designs.
Interactive Tools in Page Layout and Brochure Design
Page layout and brochure design are areas where interactivity plays a vital role. CorelDRAW offers tools that simplify the alignment and distribution of content on a page. Practicing these techniques can significantly improve speed and accuracy.
Columns, guidelines, and the Text Tool help in creating clean and organized layouts. Designers can experiment with varying brochure types including tri-folds and booklets. Practicing these skills helps designers to adapt to different client needs more effectively.
Utilizing CorelDRAW’s hidden features and shortcuts can further enhance workflow, making the design process more enjoyable and efficient. With these tools, creatives can focus on crafting visually appealing and informative designs.