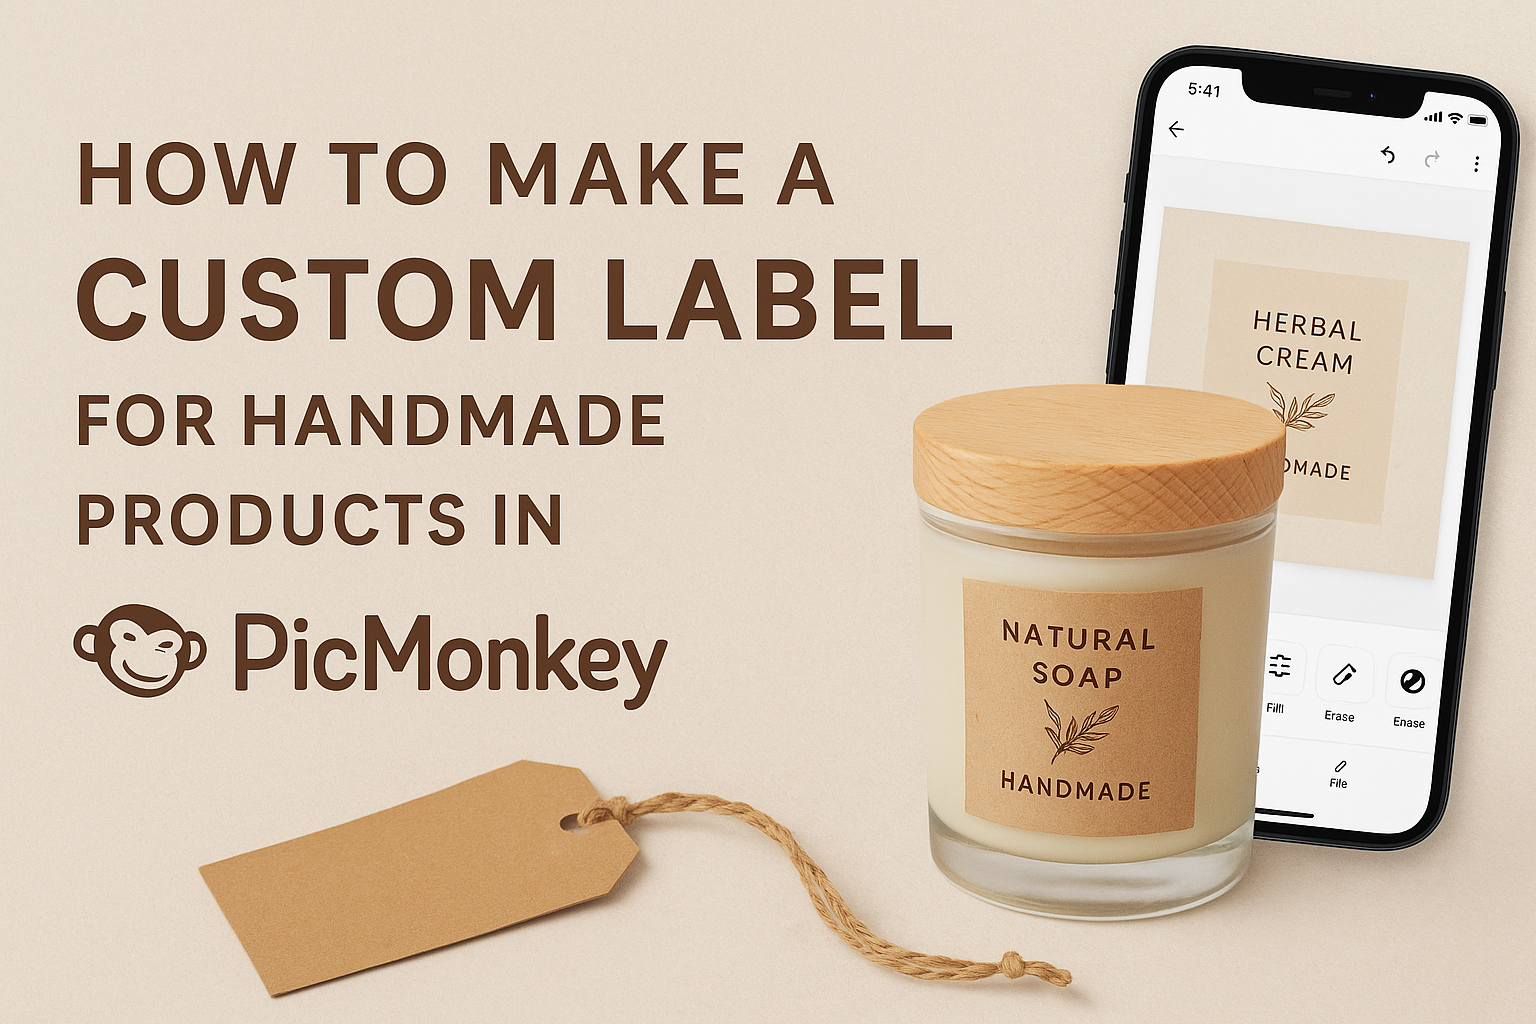
Creating custom labels can add a personal touch to handmade products and elevate their appeal. Using PicMonkey is a straightforward way to design unique labels that reflect one’s brand and style.
With user-friendly design tools, anyone can make labels for everything from jars of homemade jam to handmade crafts.
PicMonkey offers a variety of graphic options and templates, making it easy to get started. They allow users to incorporate colors, fonts, and images that represent their creations.
Whether for personal use or to enhance products for sale, custom labels help items stand out and create a memorable impression.
Getting Started with PicMonkey
PicMonkey is user-friendly and provides the tools needed to create custom labels for handmade products. Learning how to set up an account and navigate the interface can make the design process smooth and enjoyable.
Creating an Account
To begin using PicMonkey, a user must create an account. This process is simple and quick.
They can visit the PicMonkey website and click on “Sign Up.”
Users can choose to sign up using their email address or connect through Google or Facebook. After entering their details, they might receive a confirmation email. Clicking on the link in the email will complete the registration.
Once the account is set up, users can explore PicMonkey’s features. They should consider choosing a subscription plan that meets their needs, as there are both free and paid options available.
Navigating the Interface
After logging in, users will find the PicMonkey interface welcoming and intuitive. The main dashboard features a toolbar at the top with options like “Design,” “Edit,” and “Collage.”
The design area is where the magic happens. Users can select different shapes, colors, and fonts from the menu on the left. Each feature is clearly labeled for easy access.
To start creating a label, users can click on the “Design” button. This action opens up a blank canvas that can be customized. They can choose a size for their label to fit their product perfectly.
Designing Your Custom Label
Creating a custom label involves several key steps to achieve a professional look. By focusing on the canvas size, selecting a template, customizing text elements, adding graphics, and using layers, anyone can design a standout label for their handmade products.
Selecting the Right Canvas Size
Choosing the correct canvas size is crucial for a well-fitted label. PicMonkey allows users to set dimensions in inches, pixels, or millimeters.
- Think about the product size: Measure the intended surface for the label to ensure it fits nicely.
- Common dimensions: A popular size for small products is 2″x3″, while larger items may need 4″x6″.
- Resolution matters: Opt for a minimum of 300 DPI for clear and crisp printing.
This attention to detail sets a solid foundation for the entire label design.
Choosing a Template
PicMonkey offers a variety of templates that help streamline the design process. Users can start with a pre-made template to save time.
- Browse by category: Look for templates related to handmade goods, such as craft labels or wedding favors.
- Customization options: Each template is fully adjustable, allowing for unique modifications, including colors and styles.
- Preview before finalizing: Always review the selected template to ensure it aligns with the product’s theme and target audience.
Selecting the right template enhances creativity and provides a polished appearance.
Customizing Text Elements
Text is a primary focus of any label, making customization pivotal. PicMonkey offers various font styles and editing tools to make text stand out.
- Choose readable fonts: Use bold or clear fonts that are easy to read from a distance.
- Font size matters: Adjust font size appropriately based on the label size and the amount of information.
- Color and alignment: Utilize contrasting colors for text and background. Centering or left-aligning can also affect visual appeal.
Investing time in text customization ensures that the label communicates effectively.
Adding Graphics and Logos
Incorporating graphics or logos can significantly enhance a label’s visual impact. This adds a professional touch and can help brands pop.
- Upload personal logos: PicMonkey enables easy uploading of logos to create a unique brand identity.
- Use stock images: The platform provides access to a library of graphics, perfect for adding flair.
- Keep it balanced: Ensure that graphics complement the text and don’t overwhelm the overall design.
Thoughtful graphic choices will elevate the label and make it memorable.
Using Layers and Textures
Leveraging layers and textures can bring depth and interest to a label’s design. PicMonkey simplifies the layering process, allowing users to create a multi-dimensional look.
- Layering elements: Users can stack text and graphics for a rich appearance. Adjust opacity to blend elements smoothly.
- Texture backgrounds: Adding textured backgrounds can help labels stand out. Options might include a linen look or a watercolor effect.
- Experiment freely: Encourage experimentation with different layers and effects to discover unique designs.
Mastering layers and textures results in a striking label that reflects the essence of the handmade product.
Finalizing Your Label Design
When finalizing a label design in PicMonkey, it is important to focus on adjusting colors and fonts, applying effects, and ensuring the design is saved correctly. These steps will help create a professional and eye-catching label that represents the brand well.
Adjusting Colors and Fonts
Color and font choices are vital in label design. They should reflect the brand’s style and appeal to the target audience.
Start by selecting colors that align with the brand’s identity. Use the color wheel tool in PicMonkey to explore complementary shades. Keep it simple; too many colors can be distracting.
Next, choose fonts carefully. Consider readability and style; a playful font may suit a craft product, while a clean font is ideal for more formal items. Limit the number of font styles to two or three to maintain a cohesive look.
Applying Effects and Filters
Effects and filters can enhance the label’s overall appeal. They can add texture or create a unique look.
PicMonkey offers various effects. Users can experiment with shadows, highlights, and textures. A subtle shadow can give the text depth, while a texture can make the background pop.
Filters help in setting a mood. For instance, a vintage filter might work for handmade goods. Always preview the effects to see how they impact the design before finalizing.
Saving Your Design
Once satisfied with the design, saving it correctly is crucial for future use. PicMonkey provides options to save in different formats.
For print, it is best to choose high-resolution formats like PNG or JPG. These formats ensure the label maintains its quality. If the label needs adjustments later, consider saving a project file.
Take a moment to name the file clearly for easy retrieval. This organization helps avoid confusion when working on multiple designs in the future.
Tips for Printing and Applying Labels
Creating beautiful labels involves more than just design. The right materials, techniques, and application methods can make a big difference in the final product. Here are important tips for getting it just right.
Choosing the Right Paper and Printer
Selecting the correct paper is crucial for quality labels. It is best to use specialty label paper made for inkjet or laser printers. This type of paper is designed to hold ink well, ensuring vibrant colors and sharp text.
There are various finishes available, including matte, glossy, and waterproof. A glossy finish can enhance colors, while matte offers a more subtle look. Choosing waterproof paper is also smart for products that might come in contact with moisture.
When it comes to printers, using a high-quality printer is essential. A printer that offers resolution settings of at least 1200 dpi will produce sharp, clear results.
Printing Techniques for Professional Results
Taking the time to adjust printer settings can lead to better quality labels. Always select the right paper type in the printer settings. This ensures that the printer applies the correct amount of ink.
Before printing the final run, a test print on regular paper can help identify any design issues. It allows for checking alignment and spacing without wasting label paper.
If possible, using a printing service can also yield better results. Professional printing services often provide high-resolution, color-accurate outputs that enhance the label’s appeal.
Cutting and Applying Your Labels
After printing, careful cutting is necessary for a polished look. A paper trimmer or sharp scissors can ensure clean edges.
For intricate shapes, a craft knife and cutting mat may work best.
Application requires precision to avoid air bubbles. It’s best to start applying a label from the center, smoothing it outward. This helps prevent creasing and allows for better adhesion.
For the best results, applying labels to clean, dry surfaces ensures they stick well. Keeping fingers clean also helps prevent smudges on the labels.
This attention to detail will give products a professional finish.