When creating print-ready documents, understanding bleeds and margins is essential for a professional finish.
Properly setting these elements helps prevent unwanted white edges and ensures that the design looks great after trimming.
Whether it’s for a business card or a poster, knowing how to work with these aspects can elevate any print project.
Bleeds extend the design beyond the trim line to ensure color or images reach the edge of the paper, while margins create safe zones for important text and graphics.
By following best practices, she can avoid common printing mistakes that could ruin her hard work.
Mastering the use of bleeds and margins is crucial in the design process, allowing for creativity without sacrificing quality.
Understanding these concepts not only boosts confidence but also enhances the overall look of printed materials.
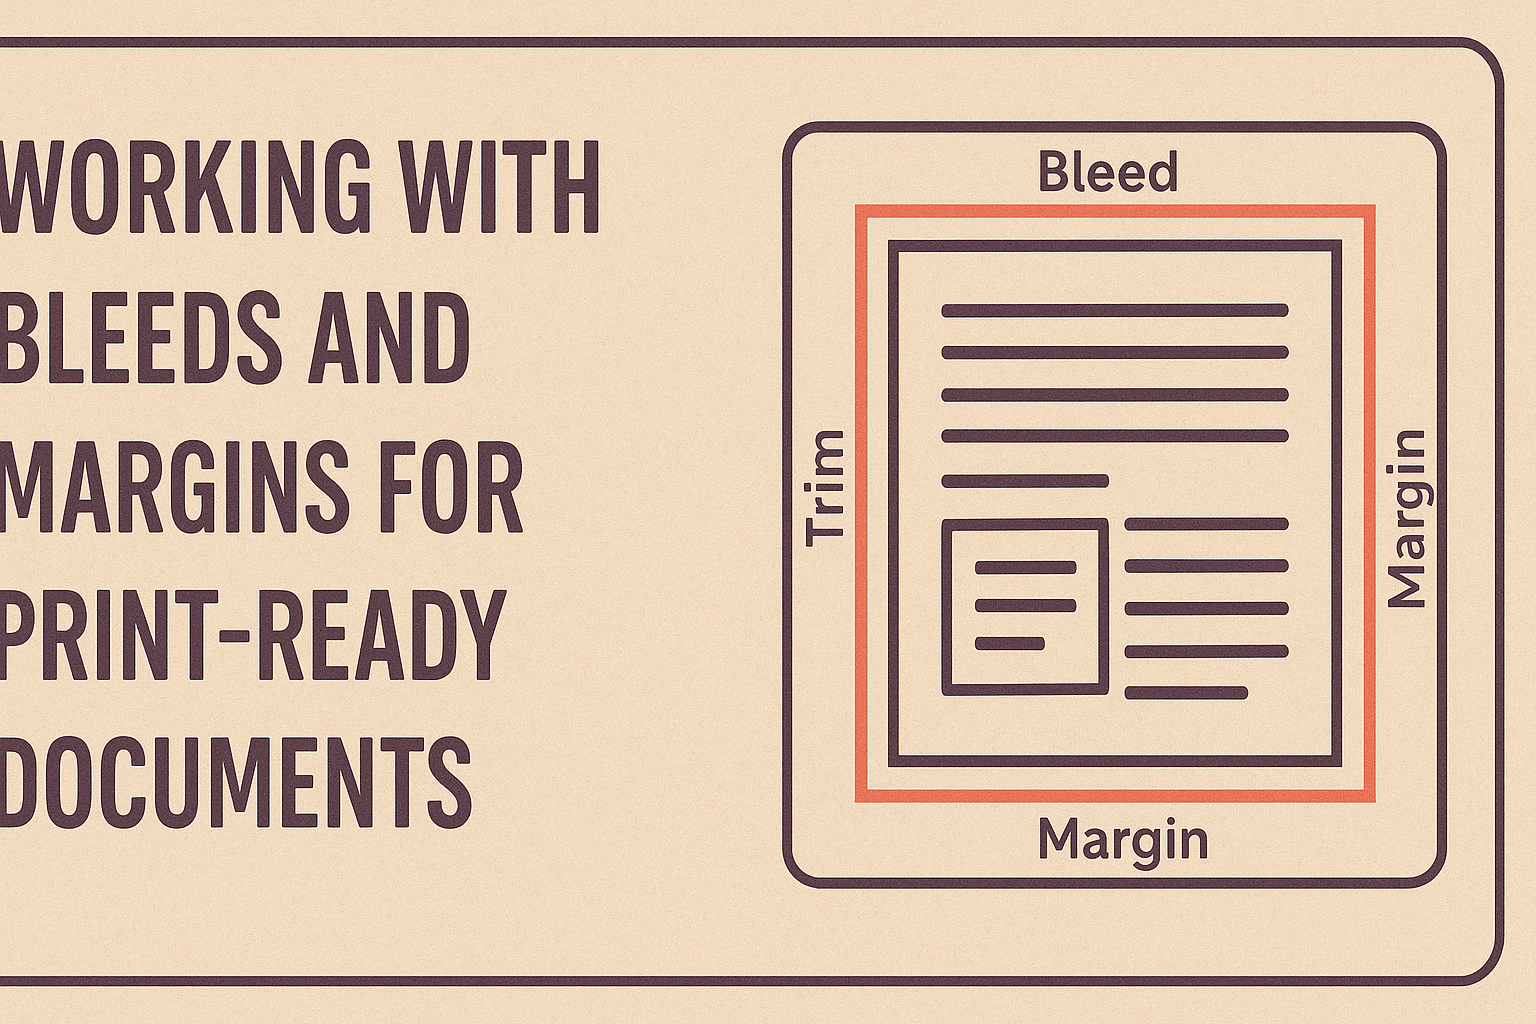
Understanding Bleeds in Printing
Bleeds play a crucial role in print design, ensuring that colors or images extend to the edge of a printed piece.
Knowing how to work with bleeds helps create a professional look in various print materials.
The Importance of Bleeds
When designing for print, bleeds prevent unwanted white edges after trimming. Even small misalignments during cutting can result in visible margins.
Bleeds generally extend 1/8 inch beyond the final trim size.
Using bleeds enhances the visual impact of pieces like brochures, business cards, or posters. It ensures that backgrounds and images reach the edge, creating a seamless appearance. Print shops often require bleeds to guarantee the best results.
Setting Up Bleed in Design Software
To properly set up bleeds, designers need to adjust their design software settings.
In programs like Adobe InDesign or Illustrator, this can usually be done during the document creation process.
For example, select the “Document Setup” option and input the bleed size, often 0.125 inches, in all four fields (Top, Bottom, Left, Right). This creates a guideline for where to extend colors or images.
Designers should always keep important content within the safe margin, away from the edge.
Troubleshooting Common Bleed Issues
Sometimes, designers encounter hurdles when working with bleeds.
One common issue is not extending the design far enough. If the bleed is not set up correctly, it may lead to white edges after cutting.
Another problem is insufficient trim marks for printers. Designers should ensure that they include crop marks for easy trimming.
It’s also essential to check the final PDF output settings to confirm that the bleed is included in the export.
Addressing these issues early on can help avoid frustrations and ensure a smooth printing process.
Working with Margins
Margins are essential for creating clean and professional print layouts. They ensure that important content does not get cut off during printing and help to maintain a visually appealing design.
Understanding safe margins and how to align content properly can make a big difference in finished projects.
Defining Safe Margins
Safe margins are the areas at the edge of a print document that should remain free of important content. Typically, a safe margin of at least 0.25 inches is recommended for most projects. This space allows for slight shifts during printing.
For example, when designing business cards, it’s crucial to keep text and logos within this margin. Having content too close to the edge might result in it being trimmed off. Always check the printer’s guidelines for specific requirements.
Aligning Content Within Margins
Proper alignment of content within the margins is key for a polished look. Elements like text, images, and graphics should be neatly placed to enhance readability and visual appeal.
A good practice is to use guides in design software to ensure content stays within the safe zones.
Using a consistent alignment style, such as left-aligned text for paragraphs, helps maintain a clean layout.
Also, balancing the space around images and text can draw the viewer’s eye and make the design more engaging.
Avoiding Margin Pitfalls
Common pitfalls when working with margins include ignoring guidelines or placing important elements too close to the edge. This can lead to issues when printing, resulting in cut-off content.
Another mistake is forgetting to check the printer’s specifications. Each printer may have different requirements for margins. Ignoring these can lead to wasted materials and time.
Always verify the recommended margin sizes before finalizing any document.
Prepress Checklist
Creating print-ready documents requires careful attention to specific details. Ensuring proper spacing, managing colors accurately, and inspecting the final document can significantly affect the quality of the print.
Proofreading for Spacing Consistency
Proper spacing is crucial for a professional-looking document. It helps maintain visual balance and ensures readability.
Key areas to check:
- Margins: Verify that the margins are uniform throughout the document.
- Line spacing: Ensure that line spacing is consistent for all text elements.
- Indents: Confirm that paragraph indents are applied uniformly.
Using gridlines or guides in design software can help visualize spacing.
Encourage a second set of eyes to review for any inconsistencies that might be overlooked. This can prevent costly mistakes in the final print.
Color Management for Printing
Effective color management ensures the print reflects the intended designs. Understanding how colors interact can prevent unexpected results.
Steps to manage color:
- Use color profiles: Always apply the correct color profiles (like CMYK for print).
- Spot colors: Identify and specify any spot colors to maintain brand consistency.
- Test prints: Print test samples to evaluate color before the final print run.
Software tools can assist in color calibration and help match colors between screens and printed materials. This step is vital for high-quality results.
Final Document Inspection Techniques
Before sending a document to print, thorough inspection is necessary. This final check can save time and resources.
Inspection tips:
- Print a proof: Review a physical proof to see how it looks on paper.
- Check for missing elements: Look for any images or text that may have been left out.
- Confirm bleed and trim: Ensure the bleed is adequate and that all essential elements are within the safe zone.
Creating a checklist can assist in keeping track of what to inspect.
Taking time for this step will lead to more satisfactory results.