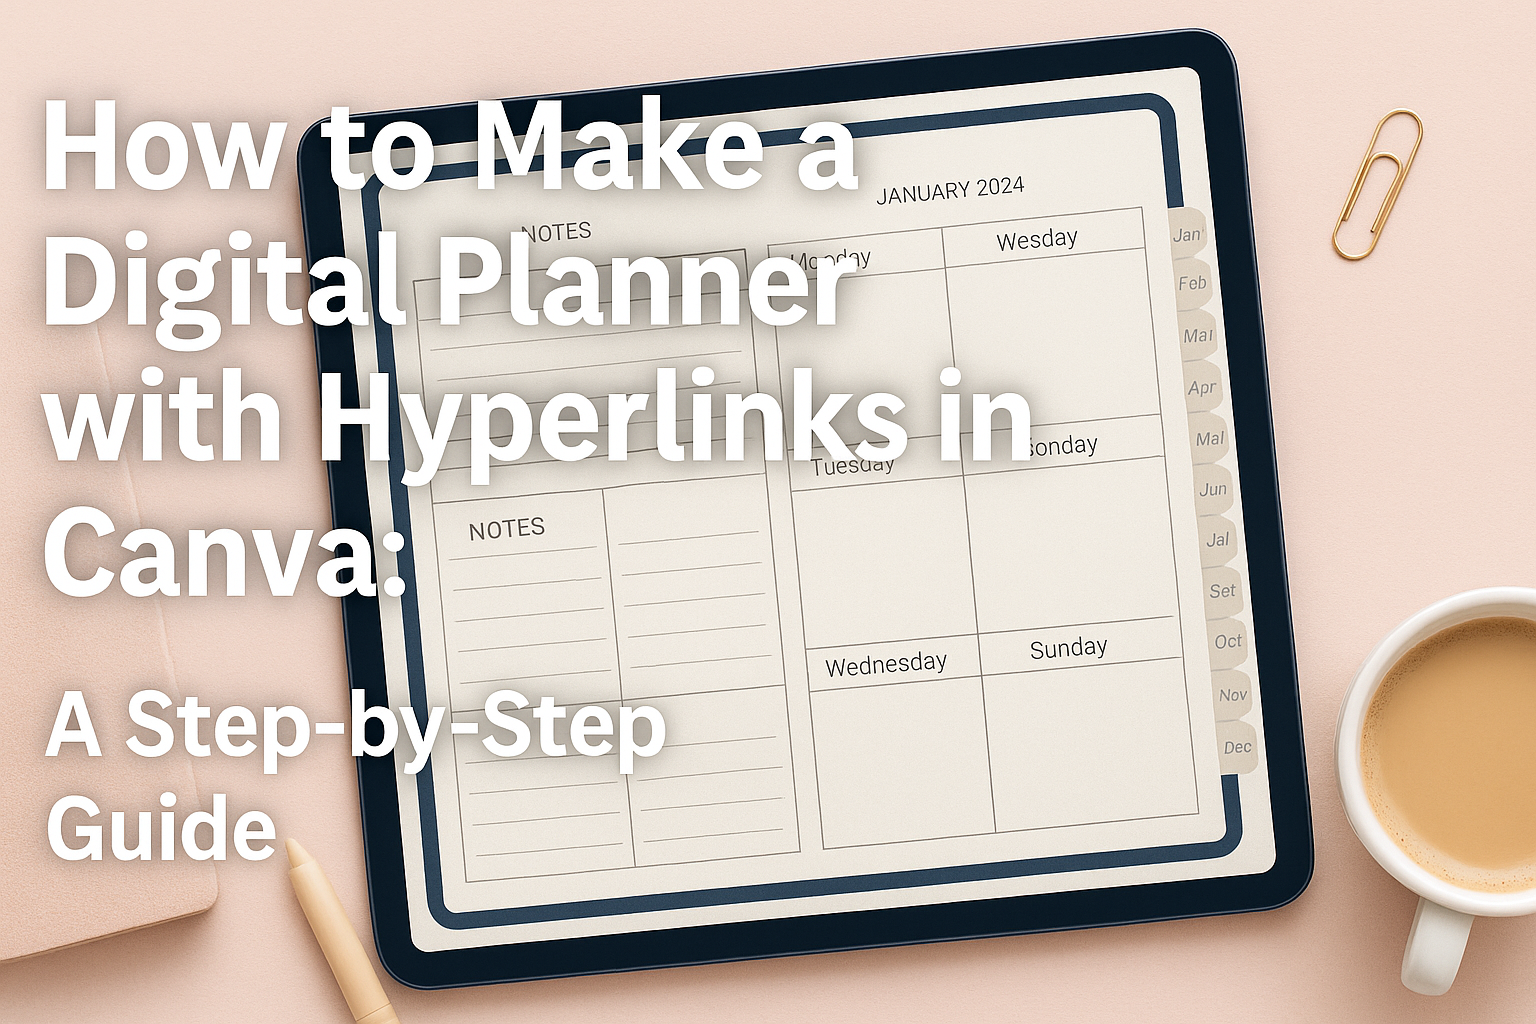
Creating a digital planner with hyperlinks in Canva can seem like a big task, but it’s easier than it looks.
Digital planners help people stay organized, offering customization to fit personal needs. With Canva, users can transform any planner into a dynamic tool featuring hyperlinks for quick navigation.
Imagine having a planner where tapping a word or button instantly moves you to a specific section.
Hyperlinks make navigating digital planners smooth and efficient. Using tools like the link button in Canva, anyone can turn text or buttons into interactive elements, making organizing tasks or schedules much simpler and more fun.
Interest in digital planning has grown, and many are exploring options to make their own custom planners.
Canva offers templates and tutorials that simplify the process, such as step-by-step instructions on hyperlinking elements within a planner.
Whether designing for personal use or sharing with others, making a digital planner in Canva opens up endless possibilities for creativity and efficiency.
Understanding Digital Planners
Digital planners are toolkits for organizing tasks, setting goals, and keeping track of important dates.
They offer versatility and convenience, which traditional paper planners might lack.
This section will explore what digital planners are, the benefits they provide, and how they compare to physical planners.
Defining a Digital Planner
A digital planner is a tool that allows users to organize their daily, weekly, or monthly activities using electronic devices like tablets or phones. These planners typically include features like calendars, to-do lists, and note-taking capabilities.
Digital planners can be customized with various templates and designs, making them personal and unique. Users often enjoy the flexibility of adding images, stickers, and even hyperlinks to easily access related content or external web pages.
Digital planners can also sync with other apps, ensuring that all information is up-to-date and accessible from multiple devices.
Benefits of Digital Planners
Digital planners offer several advantages over their paper counterparts. One significant benefit is their environmental impact. Using a digital planner reduces paper waste, contributing to a more sustainable lifestyle.
Another advantage is the ease of making changes. Users can quickly edit and rearrange tasks without erasing or crossing out items.
Portability is a major plus, as digital planners can be accessed from any compatible device. This allows users to carry important information wherever they go.
Digital planners also often come with visual tools like digital stickers or color-coded tags that help in better organizing and prioritizing tasks or events.
Comparison: Digital vs. Physical Planners
When comparing digital and physical planners, each has its unique strengths.
Digital planners excel in flexibility and customization. They allow users to incorporate multimedia elements, such as audio notes and photo attachments, making them interactive and engaging.
Physical planners, on the other hand, offer tactile satisfaction that many people appreciate. Writing by hand can help with memory retention, and physical planners don’t rely on battery power or device compatibility.
Digital planners are less prone to physical damage or being misplaced. Meanwhile, some prefer the simplicity and tradition of a paper planner. The choice between the two often depends on individual preferences and lifestyle needs.
Getting Started with Canva
This section guides you through the initial steps of using Canva to create a digital planner. You’ll learn how to set up your account, explore the interface, and pick a template that fits your planner’s needs.
Creating a Canva Account
To start using Canva, the first step is creating an account.
Head over to Canva’s website and click on the “Sign Up” button. You can sign up using an email address or through accounts like Google or Facebook.
After signing up, Canva may prompt you to choose the purpose of your account, such as personal use or business. This helps Canva to offer tailored features and suggestions.
A welcome tour usually follows, highlighting key features. It’s worth spending a few minutes on this as it offers helpful insights. Once your account is ready, you’ll land on the main dashboard where you can start creating your projects.
Navigating the Canva Interface
Navigating Canva’s user-friendly interface is straightforward.
The main dashboard provides access to templates and design types on the left side. You’ll see tabs like All Your Designs, Shared With You, and Brand Kit.
The central workspace is where you create your design. At the top is the toolbar with options to customize text, insert elements, and adjust settings.
Familiarize yourself with these options, as they are integral for detailed design work.
On the side, you’ll find a panel to add photos, text, charts, and more to your canvas. Simply click and drag elements into your design.
Experimenting with these features can boost your creativity and help you design more effectively.
Choosing the Right Template for Your Planner
Selecting the right template is crucial for designing an effective planner.
In the search bar, type “Digital Planner” to explore the available options. There are countless layouts with varying styles, like daily, weekly, and monthly planners.
Consider what type of planner suits your needs. Look for templates featuring hyperlinks, sections, and designs that match your style. You can also filter templates by category for quicker results.
After picking a template, you can customize it with your preferred fonts, colors, and elements. This personalization makes your planner unique and tailored to your preferences.
Don’t hesitate to try different styles before settling on a final design.
Designing Your Planner’s Layout
Creating a digital planner in Canva requires careful layout design to ensure easy navigation and personalized touches. From setting up the planner’s structure to choosing design elements, Canva offers tools to create a planner that’s both functional and appealing.
Setting Up the Planner’s Structure
When beginning the layout process, it’s crucial to establish a clear structure.
This involves specifying the pages you’ll need, such as month views, weekly spreads, and daily pages. Each page should serve a distinct purpose.
Using tables or grids can help in organizing content. The structure provides a roadmap, ensuring that every page connects logically to the next.
Hyperlinks are central to a digital planner’s effectiveness. By linking sections like monthly overviews to daily entries, navigation is simplified, creating a cohesive experience.
Customizing Design Elements
Customizing design elements lets users add personal touches, making the planner unique.
Canva offers a range of elements like fonts, colors, and graphics to explore. Bold headings can draw attention to important sections, while color schemes can reflect the planner’s theme.
Incorporating images or illustrations can add flair. Icons or stickers enhance both style and functionality, marking significant dates or tasks. These visual elements make the planner engaging and visually appealing.
It’s important to maintain balance, ensuring that design elements enhance rather than overwhelm the layout. Consistency in design choices strengthens the planner’s overall aesthetic.
Creating Consistent Themes & Styles
Consistency in themes and styles across the planner is key for a seamless look.
Choose a color palette and stick to it throughout the pages. This creates visual uniformity and makes navigation intuitive.
Using a limited range of fonts contributes to a professional and organized feel. Styles should complement each other, reinforcing the planner’s identity.
Themes can reflect the planner’s purpose. For instance, a professional planner might use muted tones and clean fonts, while a personal planner might include playful colors and creative fonts.
Paying attention to how these elements interact can elevate the planning experience, making it not just functional but also enjoyable.
Adding Interactivity with Hyperlinks
Incorporating hyperlinks into a digital planner can transform it into an interactive tool. Hyperlinks allow users to navigate easily between pages, sections, and even to external resources. This guide will help users seamlessly add these interactive features to their digital planners using Canva.
Understanding Hyperlinks in Digital Planners
Hyperlinks are clickable links that take the user from one place to another. In a digital planner, hyperlinks can connect different sections, pages, or external websites. This feature makes it easy for users to move through the planner efficiently.
For instance, linking pages allows users to jump to specific dates or tasks with a single click.
Understanding hyperlinks is crucial for building a functional digital planner. Clear navigation enhances the user experience.
Users should plan ahead and decide which pages or sections they want to link. Structuring the planner with hyperlinks helps maintain a logical flow, making it more intuitive and engaging.
Inserting Hyperlinks in Your Canva Planner
To add hyperlinks in Canva, users start by selecting the text box or element they want to link.
In Canva, there’s a Link button in the toolbar. Clicking this opens a window where users can either type a URL or select a page within the planner.
After deciding on the destination, they click “Apply” to finalize the hyperlink.
It’s important to test hyperlinks to ensure they work correctly. Testing includes clicking each link to see if it leads to the right destination.
Users should be meticulous in this step to ensure a smooth and cohesive planner. A well-linked planner can greatly enhance usability and enjoyment.
Linking to Pages, Sections, and External Resources
When linking within the planner, users can connect pages like monthly overviews, weekly layouts, or any other section. This makes it simple to navigate between different parts.
For instance, users can jump from the front page to any weekly layout in a flash.
Beyond internal linking, users might also want to link to external resources. This could include a website with additional information or a resource page.
To do this, they enter the external URL in the link field. The balance between internal and external links can make a planner both versatile and informative.
Enhancing Your Digital Planner
Elevating your digital planner involves adding visual elements and using typography mindfully. These enhancements not only make the planner visually appealing but also functional and engaging.
Incorporating Graphics and Icons
Incorporating graphics and icons can add visual flair to a digital planner. Icons are useful for quickly identifying different sections or tasks.
Canva offers a vast library of icons that can be easily added to any planner layout. Users can select icons that match the planner’s theme or use images to create custom graphics.
Graphics can be used to create sections or highlight important tasks. By using bright colors or distinctive patterns, these graphics help in organizing the planner better. Canva enables users to drag and drop these elements, making it simple to customize the planner according to personal preferences.
Using Fonts and Typography Effectively
Choosing the right fonts and employing typography effectively can significantly impact a digital planner’s readability and design.
Canva provides numerous font options that can be used to match any style or theme. Combining different fonts can create a balance between headers and body text.
For example, using bold fonts for titles and serif fonts for body content can improve readability.
It’s important to keep consistency in font size and style throughout the planner. Adjusting line spacing and alignment also enhances the planner’s overall appearance, ensuring each text component is easy to read and visually appealing.
Inserting Images and Videos
Adding images and videos can make a digital planner interactive and engaging.
Images, such as personal photos or artwork, bring a personal touch and make the planner more relatable. Canva makes it easy to upload and insert images directly into the planner pages.
For those interested in multimedia elements, embedding videos can provide additional information or inspiration within the planner.
Videos can be hyperlinked to external sites or uploaded directly if the planner supports video formats. This feature can be particularly useful for tutorials or motivational content, creating a dynamic and informative planner experience.
Organizing Planner Content
When creating a digital planner in Canva, organizing content efficiently is key. This involves setting up sections like tabs, integrating tools like calendars and checklists, and using Canva’s planning features to keep everything in order.
Creating Tabs and Sections
Tabs and sections help users jump quickly between different parts of a planner.
To set these up in Canva, one would start by creating a consistent layout for each tab. For example, use specific font styles, colors, and icons for clarity.
Naming tabs clearly, like “Calendar” or “Notes,” is useful. It’s important to ensure that the tabs are easy to read and access.
Canva offers options to link these tabs to other pages, giving the planner a user-friendly design. Users can also experiment with different shapes or designs to make the tabs more visually appealing.
Integrating Calendars, Checklists, and Task Lists
Adding calendars, checklists, and task lists makes a digital planner more practical.
Users can create a month-at-a-glance view by inserting a calendar template. Canva allows customization of calendar design, making it easy to match personal or brand styles.
Task lists and checklists are easy to insert. They help users keep track of important tasks or items.
Canva offers elements to create checkboxes or task lines, which can be configured to fit the planner’s aesthetic. It’s helpful to organize these elements in a user-friendly layout that reduces clutter and enhances functionality.
Utilizing Canva’s Content Planner Feature
Canva provides a Content Planner feature that can streamline the organization process.
It allows users to plan their content ahead of time, which can be especially useful for planners with regularly updated sections.
Within this feature, users can set reminders, schedule posts, or organize events. This tool simplifies planning, providing a centralized location for managing various planner elements.
By using Canva’s Content Planner, users ensure everything from calendar events to tasks is well-organized and easy to navigate, reducing the need for separate management tools.
Exporting and Sharing Your Planner
Creating a digital planner is just the beginning. It’s also important to know how to export it with different options and how to effectively share it with others.
Exporting Options in Canva
Canva offers several ways to export your planner, ensuring it is usable for everyone.
To export your planner, start by clicking the “Download” button typically located in the top right corner of the Canva interface.
You can choose formats such as PDF, PNG, or JPEG. Selecting PDF (Standard) is ideal for basic use, while PDF (Print) is better if you need high-quality prints.
After choosing the format, consider additional settings. For multi-page planners, enable the option to export all pages in a single file.
Keep file size in mind; larger files may be difficult to share or store online. If colors are essential, ensure that the export settings maintain the planner’s color accuracy.
When exporting, always preview your planner to make sure the hyperlinks function properly. This last step can save time and avoid errors for users later on.
Sharing Your Digital Planner
Once your planner is exported, sharing it effectively is key.
To share a digital planner, first decide how because the method affects accessibility.
Email is quick and good for single recipients. If sharing with a group, consider using cloud storage options like Google Drive or Dropbox.
Upload the planner and generate a shareable link. Ensure that permission settings match your goals—view only for keeping the design secure, or editable if collaboration is needed.
For public sharing, you may also consider online platforms or social media. Each platform has its own method for uploading and sharing files, so follow the guidelines to maintain planner quality.
When sharing, it’s helpful to provide instructions or notes. This ensures users know how to use the hyperlinks effectively, making the planner more user-friendly and valuable.
Tips for Effective Planner Usage
Digital planners can greatly enhance productivity if used properly. To get the most out of a planner, it’s important to manage tasks effectively, sync across devices, and update regularly to reflect changing priorities and plans.
Managing Tasks and Reminders
A digital planner is a great tool for organizing tasks.
Users should prioritize important tasks by assigning deadlines and categorizing them by urgency. Breaking down large tasks into smaller, more manageable ones can make them less overwhelming.
Reminders are also crucial. Setting up automatic notifications keeps users on track and helps them meet deadlines.
Color-coding tasks can add another layer of organization, making it easier to see what needs attention at a glance.
Consider using lists for daily tasks. A simple checklist can provide a clear overview of what needs to be done. Regularly reviewing and adjusting these lists ensures that the planner remains an effective tool for managing time.
Syncing with Other Devices and Platforms
One of the benefits of digital planners is the ability to access them on various devices.
Syncing the planner with other platforms like Google Calendar ensures that appointments and tasks are available anytime, anywhere. This can help in staying organized, even on the go.
Ensuring compatibility with multiple devices, like tablets and smartphones, allows for flexibility. This way, users can effortlessly update or check their planner without needing a specific device.
Utilizing cloud services to back up data can prevent loss and make it easy to transfer between devices.
Connecting with collaboration tools can also enhance planner functionality.
By integrating with apps used for work or communication, users ensure that all aspects of their schedule are connected, making planning seamless and efficient.
Continuously Updating Your Planner
Regular updates to a planner keep it relevant and useful. As priorities change, it’s important to move tasks or reschedule them to remain aligned with goals.
This includes adding new tasks, striking off completed ones, and sometimes re-evaluating goals.
Encouraging a routine check-in, like weekly planning sessions, can help keep everything organized. During these sessions, users can reflect on past successes and plan for upcoming challenges.
Keeping the planner visually appealing can increase motivation. Personalizing it with inspiring quotes or images could make the planner both functional and enjoyable to use.