Creating a unique wedding invitation can be both fun and rewarding. Using Gravit Designer allows anyone to easily incorporate custom graphics to make their invites stand out.
Whether it’s a beach wedding or a classic ceremony, this platform offers tools that help bring personalized designs to life.
With a variety of templates and a user-friendly interface, Gravit Designer makes it simple to start the design process.
From selecting the right layout to adding personal touches, every step can be customized to fit the couple’s vision.
The ability to drag and drop elements makes it accessible, even for those with little design experience.
For couples wanting to express their individual style, designing invitations with custom graphics is an exciting way to set the tone for their big day. By following a few straightforward steps, anyone can create stunning invitations that reflect their unique love story.
Getting Started with Gravit Designer
Before diving into creating wedding invitations, it’s important to understand the tools at your disposal.
Learning about the Gravit Designer interface and setting up a new project will make the design process smoother and more enjoyable.
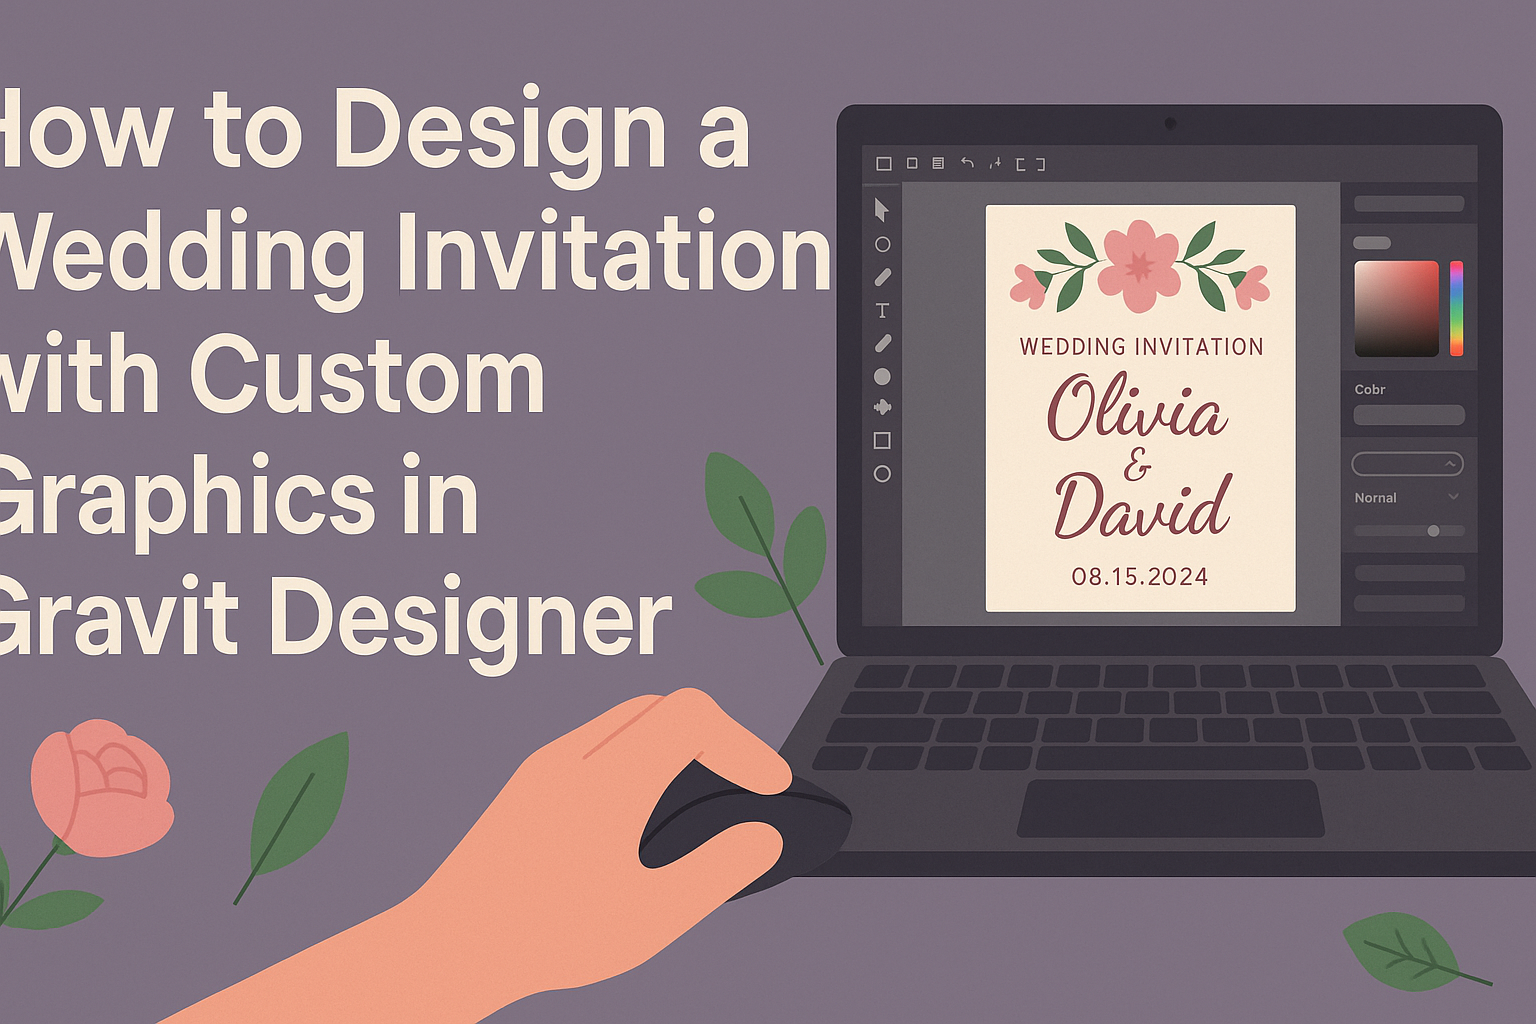
Understanding the Gravit Designer Interface
When opening Gravit Designer, users will see a clean interface focused on creativity. The workspace includes several key areas: the toolbar, canvas, and layers panel.
- Toolbar: Tools for shapes, text, and other elements are located here. This is where the design begins.
- Canvas: The main area where designs come to life. Users can zoom in and out for detailed editing.
- Layers Panel: This helps manage different components of the design, making it easier to select and edit elements.
Getting familiar with these parts will help streamline the design process, allowing for a hassle-free experience when designing invitations.
Setting Up a New Project for Your Invitation
To start a new project in Gravit Designer, users should click on “New Design” from the main menu.
- Choose Dimensions: Set the size of the wedding invitation. Common sizes include 5×7 inches or A5.
- Orientation: Decide whether the invitation will be portrait or landscape. This affects the layout significantly.
- Background Color: Select a background that fits the wedding theme. The option to choose solid colors or gradients is available.
After setting up, it’s good practice to save the project. This ensures that all progress is kept safe while users build their designs.
Designing Your Wedding Invitation
Creating a wedding invitation is a fun way to express the couple’s style. Key elements include choosing the right colors, incorporating custom graphics, and adding text with chosen fonts. Each of these components plays a vital role in making the invitation unique and appealing.
Selecting a Color Scheme and Theme
Choosing a color scheme is crucial for setting the invitation’s mood. Couples should consider their wedding theme, season, and personal preferences.
For a classic look, soft pastels work well, while bold colors can give a modern feel.
A helpful method is to create a color palette. This could include three to five complementary colors. For example:
| Color | Tone |
|---|---|
| Blush Pink | Soft & Romantic |
| Navy Blue | Elegant & Classic |
| Gold | Chic & Luxurious |
Using tools like Adobe Color can help visualize the palette before finalizing choices.
Incorporating Custom Graphics and Images
Custom graphics can make the invitation stand out. Using personal photos or illustrations adds a unique touch. She can choose floral designs, geometric shapes, or even meaningful symbols.
When creating graphics, it’s essential to maintain quality. High-resolution images ensure clarity when printed.
Gravit Designer offers various features to customize visuals, such as adjusting colors and adding effects.
Couples should also ensure that graphics align with the theme and color scheme. Keeping a consistent style throughout the entire design unifies the invitation.
Adding Text and Choosing Fonts
Text is a key part of the wedding invitation. Couples should begin with the essential information: names, date, time, and location. Keeping it clear and legible is vital.
Choosing the right font adds personality. A combination of fonts can create visual interest. Here’s a simple approach:
- Script Fonts: For names, adding elegance.
- Sans Serif Fonts: For details, ensuring readability.
She can experiment with font sizes and spacing for balance. Gravit Designer allows for easy adjustments to ensure that text enhances the overall design.
Choosing contrasting colors for the text helps to make it pop against the background.
Finalizing Your Invitation
Before completing the wedding invitation, it’s essential to make a few key adjustments. This involves fine-tuning the layout, ensuring consistency, and properly exporting the design. Each step plays a crucial role in achieving a polished final product.
Adjusting Layout and Composition
To create an appealing layout, the designer should assess the distribution of elements on the invitation.
Start by ensuring that text and graphics have enough whitespace around them. This helps maintain clarity and readability.
Using grids or guides in Gravit Designer can aid in aligning elements. The designer should also check the hierarchy of text, making sure that important details like the names and date stand out.
Balancing graphics with text is key. For example, if using an image, it should complement rather than overshadow the text.
Reviewing Your Design for Consistency
Consistency in design is vital for a professional look.
The designer should review fonts, colors, and graphic styles to ensure they align with the wedding theme.
For instance, if a classic serif font is used for the names, it should also be applied to headings and other significant text.
Additionally, colors need to harmonize. If a specific shade is selected for the background, it should be reflected in other elements like borders or embellishments. This consistency reinforces the invitation’s overall aesthetic and makes it more visually appealing.
Exporting the Final Design
Once satisfied with the design, exporting it correctly is crucial.
The designer should choose an appropriate file format based on how the invitations will be printed. Common options include PDF for high-quality prints and PNG for digital sharing.
It’s also important to check the resolution. A minimum of 300 DPI is recommended for printed invitations to ensure sharp details.
After exporting, reviewing the final file before sending it off to the printer is a good practice. This helps catch any last-minute errors, ensuring the invitations turn out as planned.