Creating custom photo filters in Affinity Designer can transform ordinary images into stunning visuals. By following simple steps, anyone can design unique filters that enhance their photography and art projects. This process not only adds creativity but also allows for a personal touch that can make images stand out.
With the right techniques, users can easily build a library of filters tailored to their style. From adding dreamy hues to boosting contrast, these custom filters can be applied quickly and effectively.
Exploring the tools available in Affinity Designer opens up new opportunities for artistic expression.
Getting Started with Affinity Designer
Affinity Designer is user-friendly and offers various tools for creative projects. Knowing how to use its interface and setting up the workspace properly can enhance the design experience. Here’s a closer look at getting started with Affinity Designer.
Understanding the Interface
Affinity Designer has a clean and intuitive interface. At the top, there is a menu bar that provides access to all major functions.
Below it, the context toolbar changes according to the selected tool, making specific options easily accessible.
On the left, various tools like the Selection Tool, Pen Tool, and Brush Tool are available. Each tool has a unique function that can help in creating custom designs and filters.
Additionally, the right side of the interface includes panels for layers, assets, and adjustments, essential for efficient design work.
Setting Up Your Workspace
Creating a personalized workspace can make designing smoother and more enjoyable. Affinity Designer allows users to customize their layout by moving panels around.
To set up, go to View > Studio and choose the panels needed.
Using multiple monitors is also supported. This way, designers can spread out tools and panels across screens, improving accessibility.
Remember to save the layout by going to View > Workspace > Save. This will let the designer return to the same setup easily in future sessions.
Choosing the Right Document Settings
When starting a new project, selecting the right document settings is crucial.
Designers can open a new document by navigating to File > New. Here, they can choose the document size, orientation, and resolution.
For custom photo filters, a resolution of at least 300 DPI is recommended for high-quality output.
Selecting the correct color format is equally important. For print projects, CMYK is ideal, while RGB works best for digital designs.
Custom settings can fit particular project needs, ensuring a professional result.
Foundations of Custom Photo Filters
Creating custom photo filters in Affinity Designer involves understanding how layers, adjustments, and blend modes work together. These elements help users modify images in unique ways, allowing for personal creativity.
Understanding Layers and Adjustments
Layers are the building blocks of any design project in Affinity Designer. They allow users to stack images and adjustments, controlling how each element interacts with others.
When creating a custom filter, placing adjustments on separate layers can enhance flexibility. For example, a user might want to apply a color adjustment without affecting the image itself.
Additionally, each layer can have its opacity adjusted. This enables fine-tuning of effects such as brightness or contrast. Layers can also be grouped, making complex edits more manageable.
Exploring Blend Modes
Blend modes determine how one layer interacts with another in terms of color and brightness. Affinity Designer offers many blend modes, each producing different results.
For instance, the Multiply mode darkens images by combining the colors of the top layer with those below. This method is useful for adding shadows or depth.
Conversely, Screen lightens images, ideal for overlays that create highlights.
Users should experiment to see how different blend modes change the composition. A simple adjustment to the blend mode can result in drastic transformations.
The Role of Live Filters
Live filters in Affinity Designer are non-destructive effects that enhance images without permanently changing them. They allow users to apply effects that can be edited later.
For example, a user can add a “Gaussian Blur” live filter to soften an image. If the user decides they want a sharper look later, they can easily adjust or remove the filter.
This flexibility is crucial for creating custom photo filters. Live filters ensure that users can tweak their designs until they achieve the desired look. This feature encourages experimentation and creativity.
Creating Your First Custom Photo Filter
To create a custom photo filter in Affinity Designer, choosing the right base image is essential. After selecting the image, basic adjustments help set the tone. Finally, layering effects and textures can enhance the look and feel.
Selecting Your Base Image
First, the base image serves as the foundation for the custom filter. Choosing a good-quality photo is crucial. A clear and sharp image can yield better results.
To select your image, open the program and click on “File,” then “Open.” Navigate to the desired image file and click to open it.
Keep in mind the image’s content and lighting. This choice will influence the adjustments made later.
Selecting an image with vibrant colors or interesting patterns can help the filter shine.
Applying Basic Adjustments
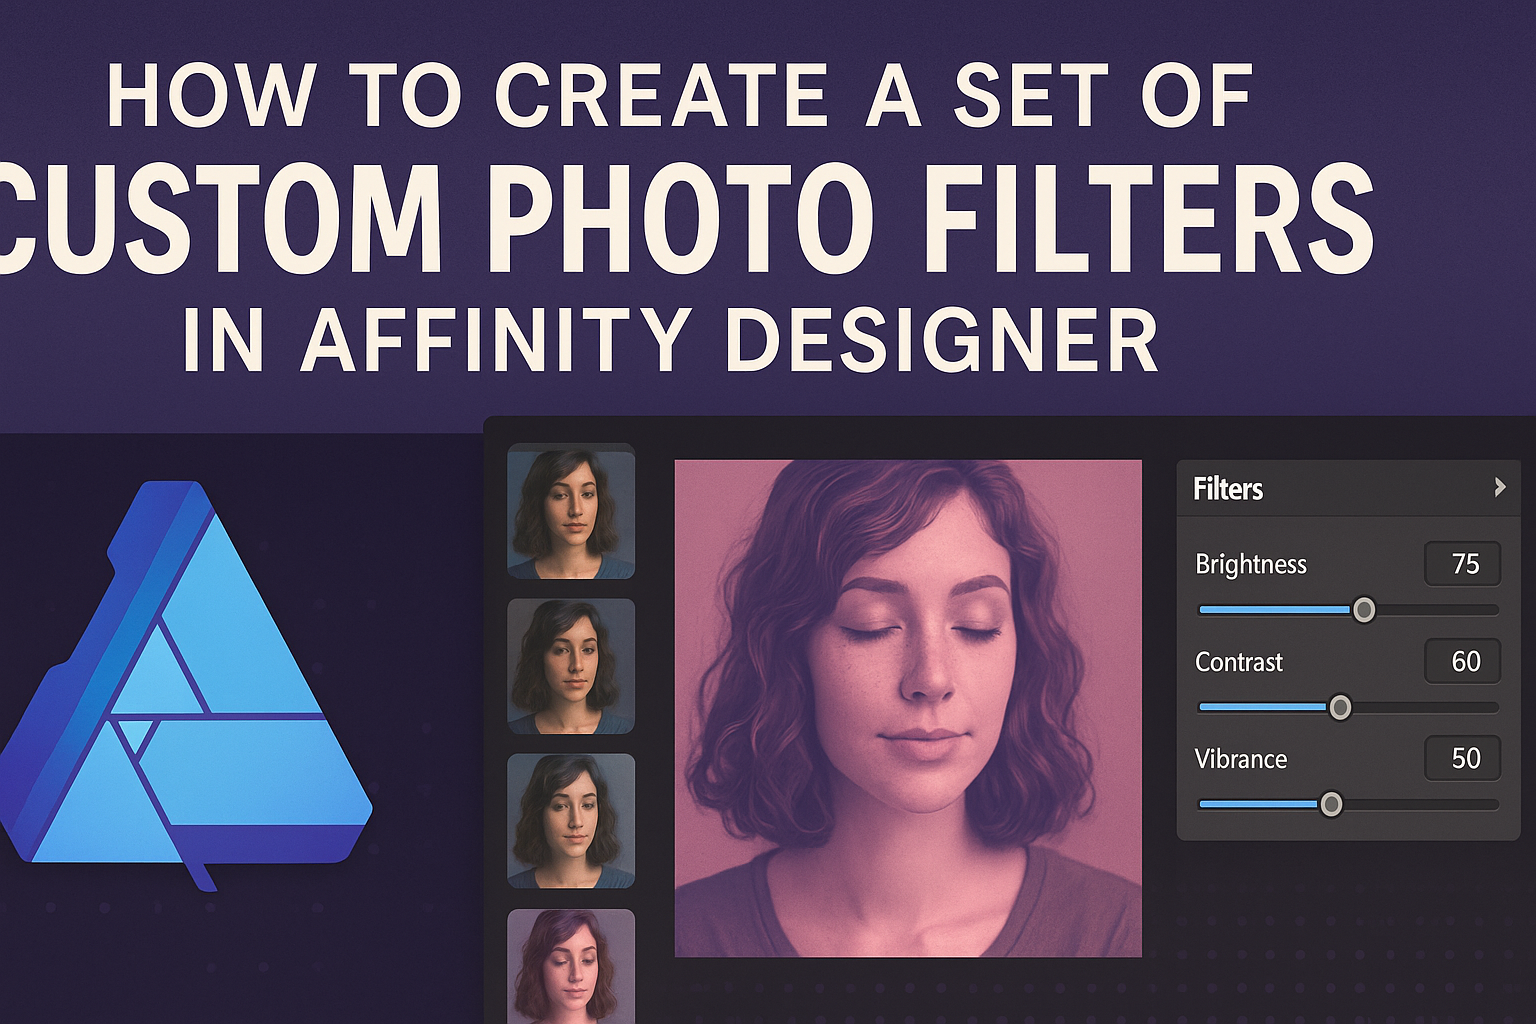
With the image open, the next step involves basic adjustments. He or she can adjust brightness, contrast, and saturation to start shaping the filter’s appearance.
To make these adjustments, go to the “Adjustments” panel. Here, various tools will allow for fine-tuning.
For instance, increasing brightness can make colors pop, while boosting contrast adds depth. These tweaks lay the groundwork for the filter.
Saturation adjustments can bring out colors or create a more muted, vintage look. It’s all about what feels right for the desired effect.
Layering Effects and Textures
Layering effects and textures add complexity and uniqueness to the filter. This step gives the photo a personalized touch.
The right textures can add depth and interest. Begin by importing texture files or using built-in ones.
Drag and drop these textures onto the image layer. Adjust their opacity and blending modes for a seamless look.
Common blending modes like “Overlay” or “Multiply” can create stunning effects. Don’t be afraid to experiment with combinations.
This final stage can transform a simple filter into something eye-catching and distinctive. With practice, they can develop a unique style that stands out.
Saving and Applying Your Filters
Creating and using custom filters in Affinity Designer can enhance any photo project. This section covers how to save your filter presets and use batch processing to apply them effectively.
Saving Filter Presets
To save a filter preset, first, create your desired effect using the editing tools. Once satisfied, go to the Filters menu and choose Save Preset.
This option allows the user to store their custom filter for future projects.
When saving, a dialog box appears. Here, the user can name the preset and add a brief description if needed. This makes it easier to identify later.
After saving, the preset becomes available in the Presets dropdown. Simply select it from the list to apply it to any photo.
Batch Processing with Macros
Batch processing is a powerful feature for applying filters to multiple images at once.
To start, the user should navigate to the Macros panel. Here, they can record a series of actions, including applying their saved filter.
First, create a new macro and name it meaningfully. Every action performed will be recorded.
After applying the custom filter, stop the recording. This macro can now be applied to a group of images.
To use it, select the images in the Layers Panel and run the macro. This saves time and ensures consistency across all edited photos.
By using macros, users can streamline their workflow while achieving a unique look with their custom filters.