Creating printed materials can be exciting, but it’s essential to get the details right.
Bleed and slug areas are crucial for ensuring a professional finish on printed documents. They allow designs to reach the edge of the page and include important information outside the trim area.
Understanding how to set these up can make a significant difference in the quality of the final product.
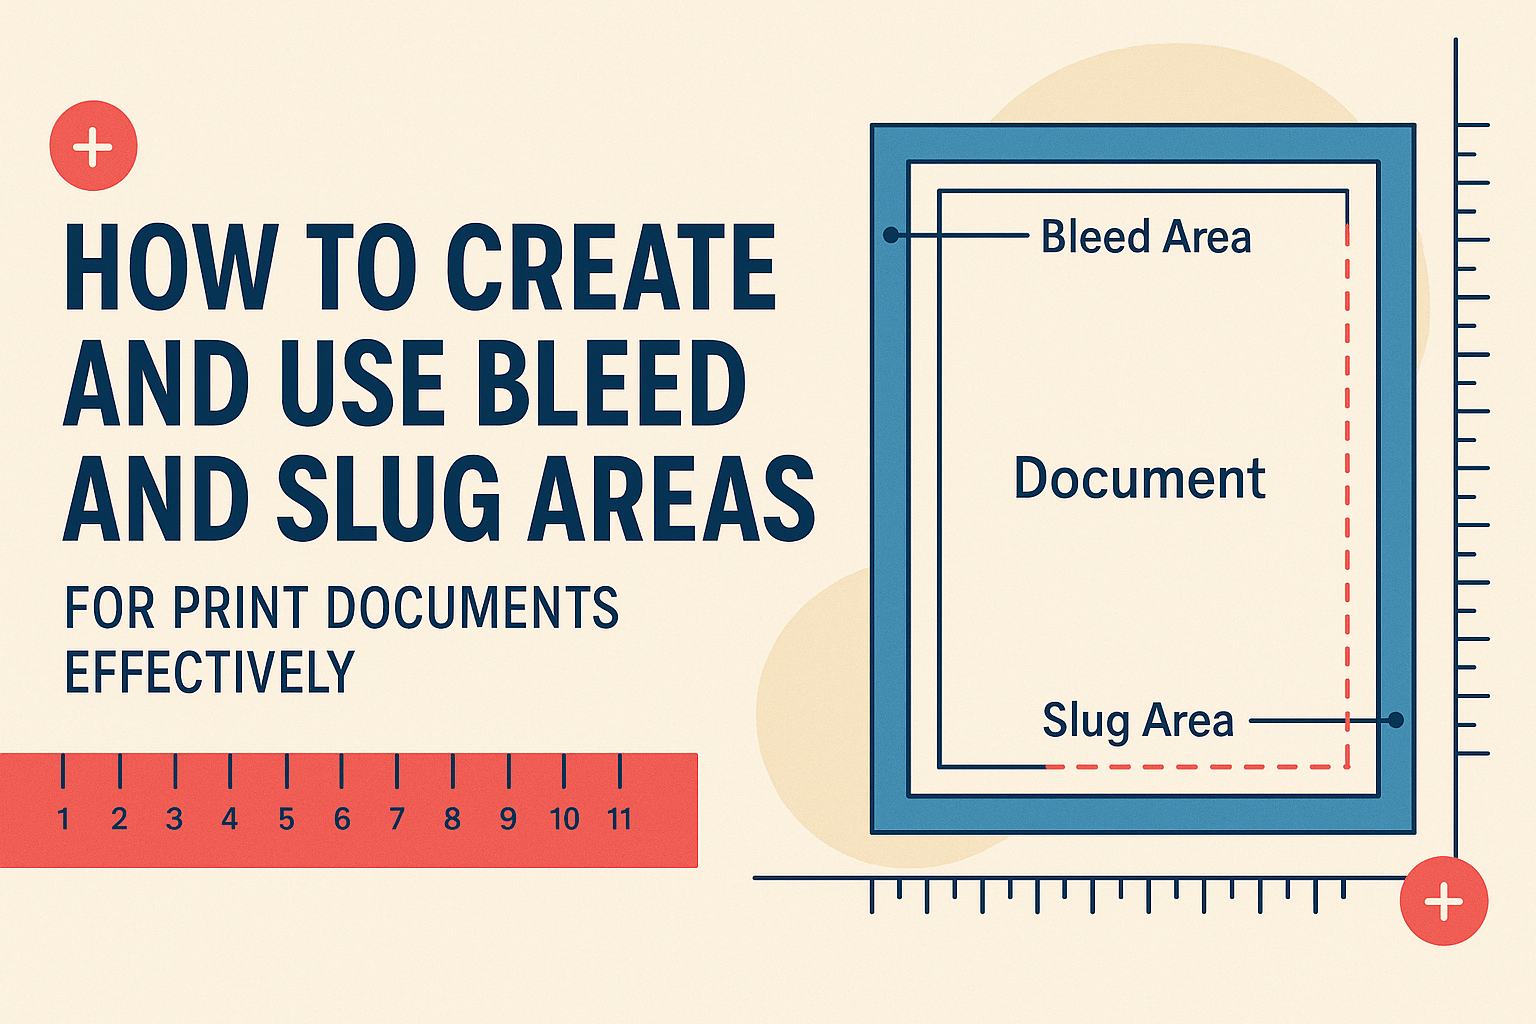
Bleed refers to the area where the design extends beyond the edge of the paper. It helps prevent white edges when the document is cut down to size.
Slug areas are used for adding details like registration marks or notes for printers, making sure nothing critical gets trimmed off.
With the right techniques, anyone can master the use of bleed and slug areas, giving their printed pieces a polished and professional look. This guide will walk through the steps to create and use these important features in various design software, ensuring every print job turns out exactly as intended.
Understanding Bleed and Slug
Bleed and slug areas are essential components of print document design. They help ensure that the final printed piece looks professional and meets industry standards.
What Are Bleed and Slug Areas?
Bleed refers to the extra space around the edges of a design. When an image or color goes to the edge of a printed page, bleed prevents any white borders from appearing after trimming.
Typically, a bleed area extends 0.125 to 0.25 inches outside the finished size of the document.
On the other hand, slug areas are additional spaces used for notes or printing instructions. They are not intended to appear in the final print. Slugs can include details like registration marks, color information, or other important notes for printers.
Overall, understanding both bleed and slug areas helps designers prepare files correctly for printing.
Importance in Printing
The importance of bleed and slug areas cannot be overstated. Bleed ensures that images and colors reach the edge of the paper, creating a polished look. Without bleed, a printed document might display unsightly white borders, ruining the design.
Slugs add value by offering instructions that improve the print process. They help communicate vital information between designers and printers. By including slugs, designers can ensure that everything is done according to their specifications.
Using proper bleed and slug settings leads to better quality prints, saves time, and reduces the risk of errors during production.
Setting Up Your Document
Establishing the right setup for a print document is crucial. This involves choosing the appropriate software and adhering to specific document setup guidelines to ensure everything fits perfectly when printed.
Choosing the Right Software
To create print-ready documents, selecting the right software is important.
Popular options include Adobe InDesign, Illustrator, and Microsoft Publisher. Each software has distinct features designed for print design.
For example, InDesign allows for detailed control over bleeds and slug settings. Users can easily specify bleed areas during the document creation process.
Meanwhile, free alternatives, like Scribus, also provide essential features for setting up bleeds and slugs.
Using specialized software helps streamline design work, making it easier to manage layout, images, and text. Choosing the right tool can make the setup process smoother and enhance the final product’s quality.
Document Setup Guidelines
When setting up a document, it is important to follow specific guidelines to ensure proper bleeds and slug areas.
-
Document Size: Start with the final size of the print piece. For example, if the target size is A4 (210mm x 297mm), include the bleed area.
-
Bleed Settings: Typically, a bleed of 3mm is recommended. This extra margin prevents white edges in the final print.
-
Slug Area: If additional information or notes for the printer are needed, add a slug area outside the bleed.
-
Resolution: Ensure images are at least 300 DPI for best quality.
By following these guidelines, the document will be well-prepared for printing, resulting in professional-looking prints.
Creating Bleed and Slug Areas
When preparing a document for print, it is essential to establish the bleed and slug areas. These parts ensure that the design looks polished and professional without unwanted borders or cut-off edges.
Defining the Bleed Area
The bleed area is the part of the design that extends beyond the final trim size. This extra space prevents white borders from appearing due to slight misalignments during cutting.
To set the bleed in software like Adobe InDesign, the user should navigate to File > Document Setup.
In the Bleed and Slug section, they can enter values, typically between 0.125 and 0.25 inches, depending on the project.
This extra margin is crucial for images and backgrounds that reach the page edges. Without it, any slight error in trimming could leave unwanted gaps, ruining the design’s appearance.
Defining the Slug Area
The slug area is used for important information placed outside the bleed area. This usually includes printer’s marks, job details, or any production notes.
To define the slug area in InDesign, the user can also adjust settings in the Bleed and Slug panel. They should add space as needed, often around 0.5 inches.
Information in this area will not appear in the final printed piece but is critical for the production team. This practice helps prevent confusion during printing and ensures that all necessary details are available for processing the job.
Finalizing and Exporting
Before completing a print document, it’s important to conduct thorough checks and export the file correctly. This ensures that the final product meets professional standards and maintains quality.
Pre-flight Checks
Performing pre-flight checks is a crucial step before exporting. These checks help to identify any potential issues with the document.
-
Check Bleeds and Slugs: Ensure that the bleed settings are correct. He or she should confirm that the slug area accommodates any extra information, like notes or marks.
-
Review Images: All images should be at least 300 DPI for print quality. Low-resolution images will appear blurry when printed.
-
Fonts and Colors: Ensure that all fonts are embedded and that colors are set to CMYK mode for printing. This avoids unexpected color shifts.
Using tools like Adobe InDesign’s built-in preflight feature can help catch these mistakes. Running these essential checks saves time and produces a better outcome.
Exporting Your Document
Once everything has been checked, it’s time to export the document.
The export process must be done with care to maintain quality.
-
File Format: Choose Adobe PDF (Print) as the format. This preserves the settings for bleed and slug areas.
-
Adjust PDF Settings: In the export dialog, select the [Press Quality] preset.
Click on the “Marks and Bleeds” tab to ensure “Use Document Bleed Settings” is checked.
- Additional Options: If needed, specify any crop marks or registration marks. These help in the printing process.
After adjusting the settings, click “Export” to create the final PDF file.
Checking the exported document one last time is a good idea. This ensures everything looks correct before sending it to print.