Fading an image can add a beautiful touch to any design project in Canva. Users can easily create a fade effect by adjusting the transparency, using gradients, or applying blur effects. This technique not only enhances visual appeal but also helps in blending images seamlessly with backgrounds.
Whether working on social media graphics or presentations, knowing how to fade images effectively opens up new creative possibilities. Many find that this simple skill can make their designs look more professional and polished.
With a few easy steps, anyone can transform their images to achieve the desired effect.
This guide will explore various methods to fade images in Canva. By the end, readers will feel confident in applying these techniques in their own designs, making their projects stand out.
Getting Started with Canva
Canva is a user-friendly platform that allows anyone to create stunning visuals.
To begin, users need to create an account and familiarize themselves with the interface. Understanding how to select the right design type is also essential for an efficient design experience.
Creating an Account
To start using Canva, one must create an account. This is a straightforward process. Users can sign up using their email address, Google account, or Facebook account.
Once the account is created, a welcome screen appears. This guides users through their first steps. It’s important to confirm email addresses for full access to all features.
Canva offers a free version with plenty of templates and tools, but there is also a Pro version for those who need more options. Exploring the differences can help users decide what best suits their needs.
Navigating the User Interface
After signing in, users will see the Canva dashboard. The layout is quite intuitive, featuring a sidebar with various tools.
Here, users can find templates, images, and elements to use in their designs.
At the top, there is a search bar to quickly find specific designs or features. The main workspace is where all the action happens. Users can drag and drop elements onto their canvas.
Canva also provides helpful tutorials and tips throughout the interface. These can guide users through advanced features like editing images or using design grids. Familiarity with this layout will enhance the design process.
Selecting the Right Design Type
Canva supports various design types, including posters, social media posts, and presentations. Choosing the correct format is vital for achieving the desired results.
Upon starting, users can browse templates suitable for different purposes. These templates can be further customized to fit personal style and branding.
To select a design type, users can explore the homepage or go through the categories in the sidebar. This approach helps narrow down the options based on the project at hand. Knowing the right design type will save time and effort during the creation process.
Understanding Layers and Images
Layers play a crucial role in designing with Canva. By organizing images on different levels, users can create complex designs easily.
Knowing how to add images and manage layers enhances creativity and design effectiveness.
Adding Images to Your Design
To add images, users can start by selecting the “Uploads” tab on the left side panel. From there, they can drag and drop images directly into the editor or use the “Upload an image or video” button.
After the image is uploaded, clicking on it will place it on the canvas.
Once the image is on the canvas, it can be resized or moved. Users can adjust the size by dragging the corners or edges. This allows for fitting images neatly into their layout.
It’s important to experiment with different placements to find the best look for the design.
Managing Layers in Canva
Managing layers in Canva is simple and intuitive.
Users can click on the image or element they want to adjust, then access the “Position” button on the top toolbar. This opens options to send an image forward or backward in the layer stack.
To keep designs organized, users can also group layers. Selecting multiple elements and clicking the “Group” option allows for easier manipulation.
This feature is helpful when adjusting the size or position of several images at once. It ensures that designs stay neat and visually appealing.
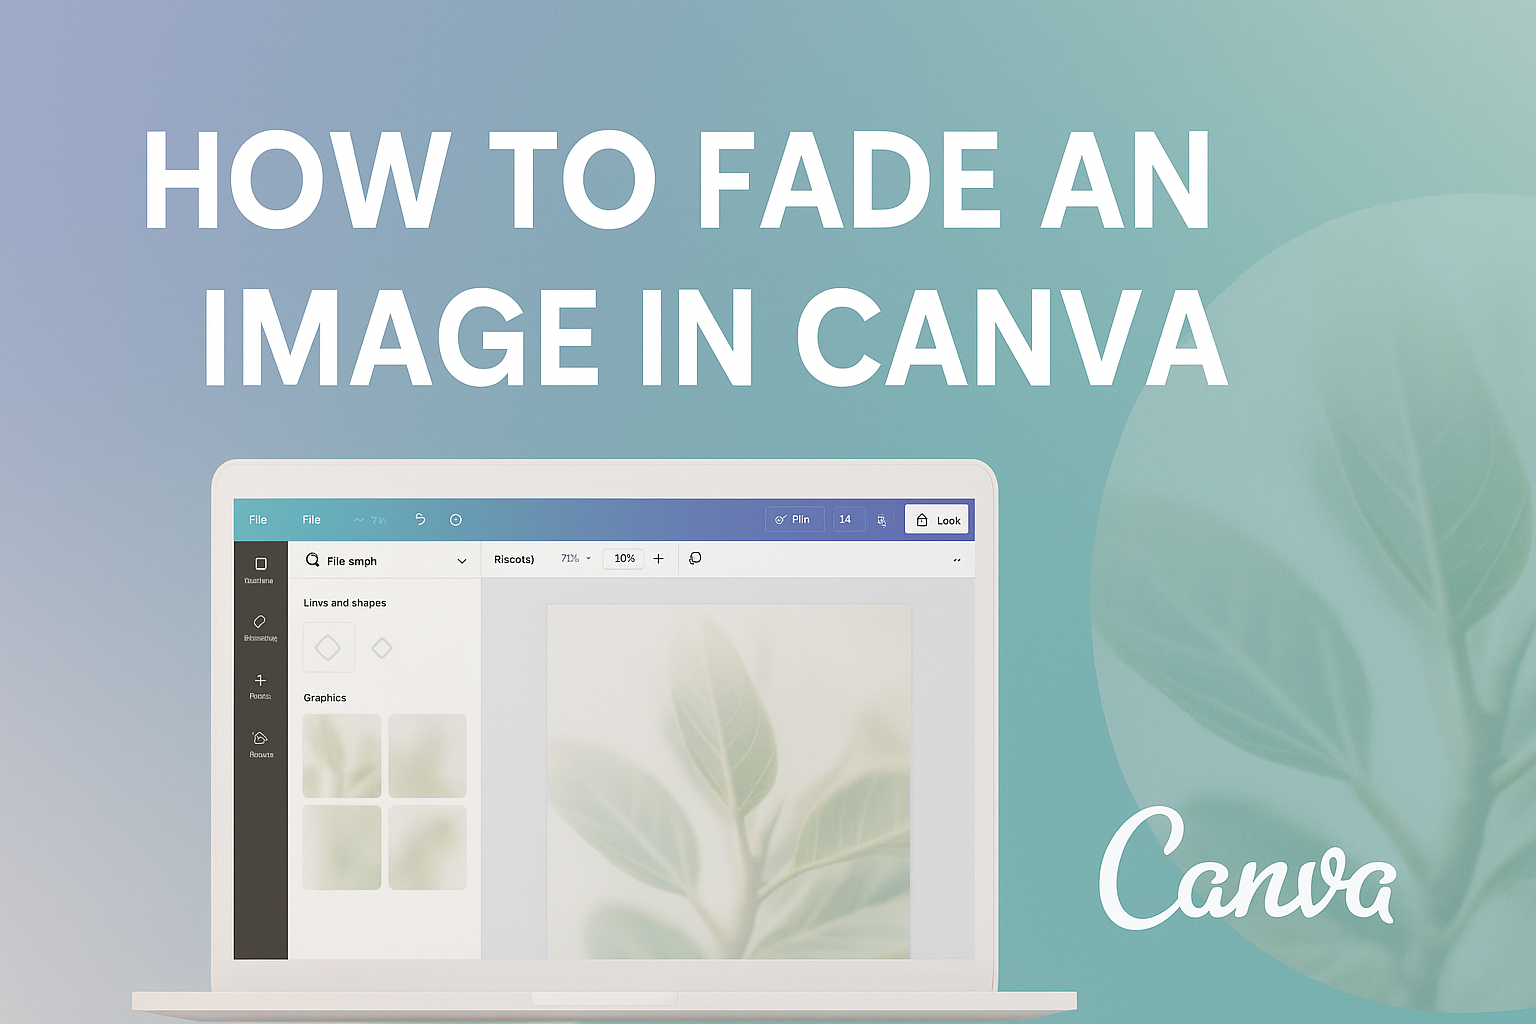
Fading Images in Canva
Fading images in Canva can enhance designs by creating a smoother transition with backgrounds or overlays. There are simple and effective methods to achieve this, allowing for both subtlety and impact in visual projects.
Using the Transparency Tool
The Transparency Tool in Canva is one of the easiest ways to fade an image.
To use it, the user first selects the image they want to adjust. Next, they click on the “Edit Image” option found in the top menu.
A slider will appear, allowing them to lower the image’s opacity. This means that the image will become more transparent, making it blend into the background more smoothly.
By adjusting the slider, they can find the right level of fading for their design. This method works well for putting text over images since it keeps the focus on the text while still allowing the image to show through.
Advantages of Image Fading
Fading images can significantly improve the overall look of a design. It can draw attention to specific elements, like text, while softening the background.
This technique is useful for creating mood or a specific atmosphere within designs. By lessening the brightness or prominence of an image, users can create a feeling of depth and professionalism.
Additionally, fading can help to unite color schemes, making designs more cohesive. This is especially important in marketing materials, social media posts, and presentations where visual appeal can make a big difference.