In today’s digital world, linking your designs to external content can make your projects stand out.
Whether it’s a website, a social media profile, or a product page, adding a link in Canva can enhance viewer engagement. Knowing how to insert a clickable link can transform a simple design into an interactive experience. This little trick can open doors to more information, drive traffic, or complete a call to action directly within your visual content.
Canva is a versatile tool that allows users to easily hyperlink text, images, and other elements.
By selecting the item and choosing the link icon, users can quickly connect their creation with external content. Learning this technique not only adds value but also makes your design more functional and appealing to your audience.
With an easy-to-use interface, Canva empowers anyone to create interactive designs without needing a background in graphic design.
For those looking to elevate their design skills, mastering this feature can be incredibly rewarding and beneficial for personal or professional projects. Whether creating marketing materials, assignments, or just fun personal projects, adding links in Canva opens up a world of possibilities.
Getting Started with Canva
Starting with Canva is simple and straightforward. The process involves creating an account and becoming familiar with the dashboard, which offers many tools for design.
Signing Up for a Canva Account
To begin, visit Canva’s website.
New users can sign up using an email address, Facebook, or Google account. Each option ensures a quick start.
Once an account is created, Canva may offer a guided tour. This helps new users get familiar with its features.
Users can choose between a free or paid subscription, depending on their needs. The free version includes many basic features, suitable for most design projects.
Make sure to confirm your email address if required, as this is essential for account security and access to support.
Overview of the Canva Dashboard
Upon logging in, users arrive at the Canva dashboard. This is the control center for all design activities.
At the top, users will find options for different projects like presentations, social media graphics, and more.
The dashboard also features a search bar. This helps locate specific templates or design elements quickly.
On the left side, a menu offers access to designs, brand kits, and other key areas. This organized layout makes navigating the site easier for users, allowing for efficient design work.
Users will notice Canva’s drag-and-drop interface. This user-friendly feature simplifies the design process, making it accessible even for beginners.
Understanding Canva’s Text Tool
Canva’s text tool is user-friendly, allowing for easy addition and editing of text. This tool helps users customize their designs by adjusting text elements to fit their needs.
Adding Text Boxes
To start with any design in Canva, adding text boxes is essential.
This can be done by selecting the “Text” tool from the side panel. Users can choose from various text styles, such as heading, subheading, or body text. Drag and drop these styles onto the canvas to add a new text box.
Once placed, the text box can be resized by dragging the corners. This helps in adjusting the width and height to fit the design. Text can also be rotated or moved around by clicking and dragging the box to the desired location.
For those needing multiple text boxes, simply repeat the process. You can easily adjust them individually or align them using the alignment tools. This flexibility allows for creative text layouts.
Editing Text
Editing text in Canva is straightforward. Click on the text box you want to modify, and the editing toolbar will appear.
Here, you can change the font style, size, color, and alignment. Canva offers a wide range of fonts and colors, giving users plenty of customization options.
To change the actual text, just click inside the box and type. Additional options allow for bold, italic, and underlined styles, adding emphasis where needed.
Users can also adjust spacing between letters and lines for better readability.
For more advanced edits, such as adding hyperlinks, use the linking tool found in the toolbar. Just select the text, click the link icon, and enter the URL. This feature is great for making text interactive and engaging.
The Basics of Links in Canva
Learning how to insert links in Canva can make designs more interactive and engaging. By adding hyperlinks, users can direct their audience to websites, documents, or email addresses effectively.
Types of Links You Can Add
In Canva, there are a few types of links you can embed into your designs.
Users can add links to external websites by selecting a design element and inputting the desired URL. Additionally, links can be made to other pages within the same Canva design. This is especially useful for creating presentations or interactive documents.
Users can also link to email addresses. By setting up an email link, viewers can click to directly open their email clients, creating a seamless way to initiate communication.
For any of these options, simply choose a design element and use the link icon to embed the URL or email address.
Preparing the Text for Linking
Before adding a hyperlink, it is important to prepare the text in Canva.
Users should first click on the text box they plan to link. To make specific words clickable, double-click to highlight only that part of the text. This careful selection ensures the most relevant content is linked for better user interaction.
Once the text is ready, the user can access the linking tool. With the text highlighted, clicking the link icon in the toolbar allows for easy insertion of the link.
Users should then paste the URL or email they want to attach and confirm to make the link active. This setup effectively connects users to targeted content through simple clicks.
Inserting a Link in Canva
Inserting a link in Canva is simple. Users can select a text element and use Canva’s built-in link tool to integrate hyperlinks effortlessly into their designs.
Selecting the Text Element
To start, users open their Canva design and choose the text element they want to hyperlink. Text elements can be entire text boxes or specific parts of text within a text box.
Next, if only a segment of the text needs linking, double-click on the text box and highlight the desired part. This can help direct viewers to specific information.
For designs with multiple elements, it’s important to remember you can link both text and images. This makes it even more dynamic, allowing viewers interactive experiences without confusion.
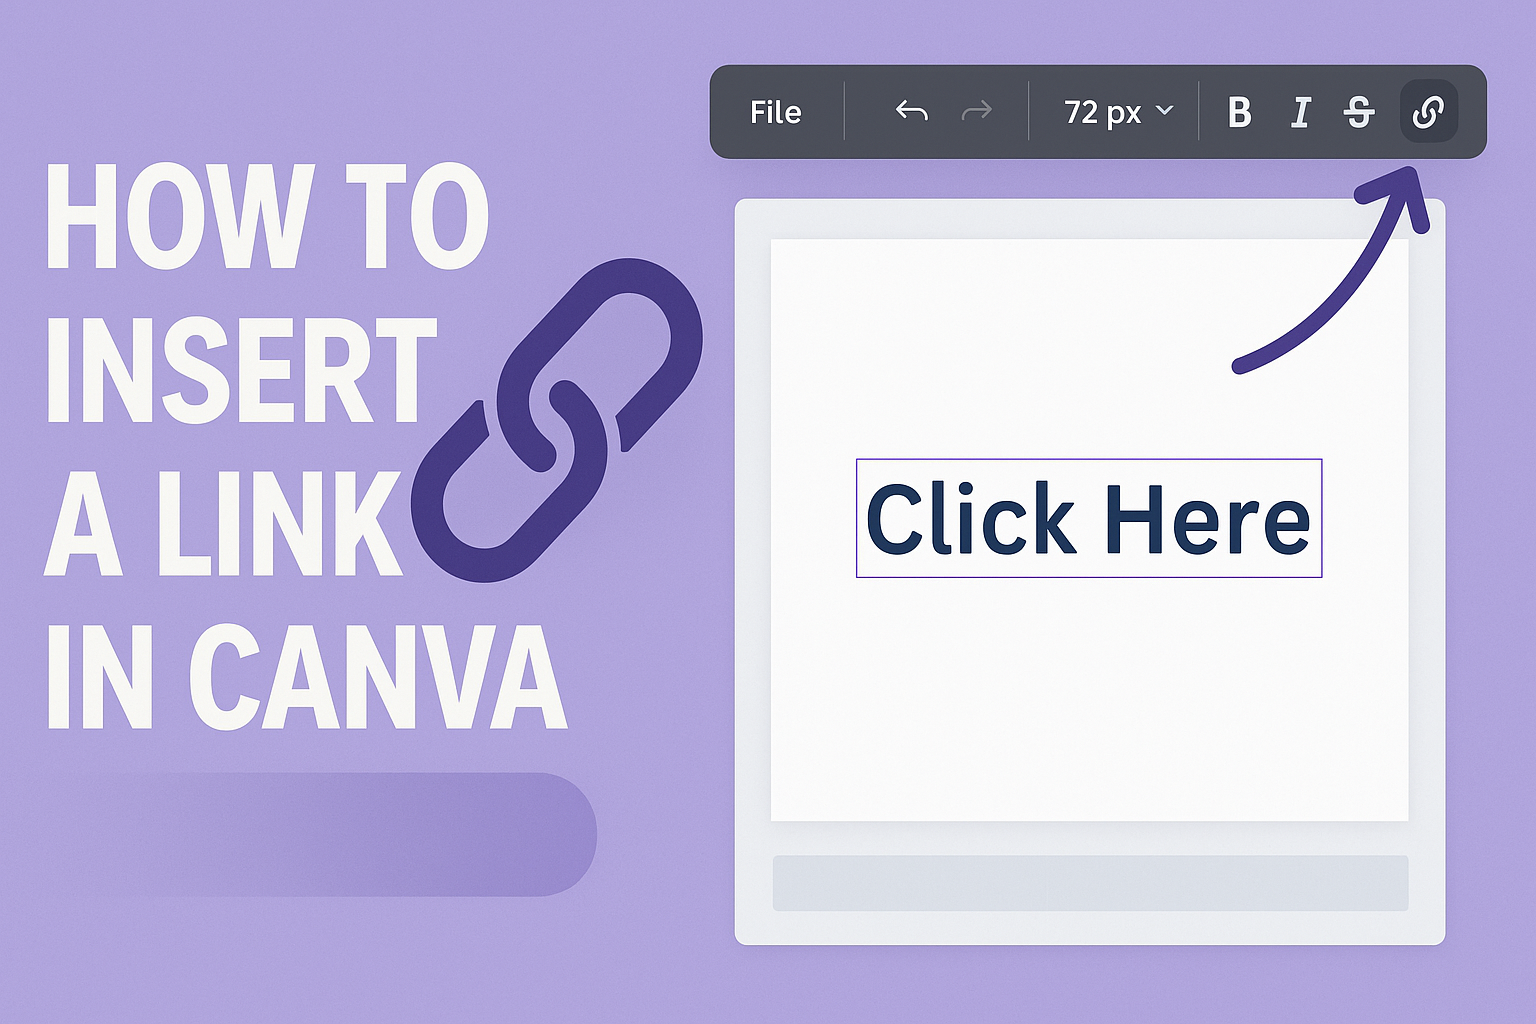
Using the Link Tool
Once the text element is selected, locate the link button in Canva’s toolbar, usually represented by a chain icon. Clicking it will open a field to enter the URL.
After typing the desired web address, press Enter on the keyboard or click elsewhere in the editor to apply the link. This makes the text clickable, connecting to external websites seamlessly.
For those who want to link to another page within the same design, choose the page link option. This method helps create navigation within larger projects, like presentations or multi-page documents, enhancing user engagement.
Customizing Your Link Appearance
Customizing how links appear in Canva can enhance the visual appeal of your design. This involves modifying text color, style, size, and font to ensure consistency and attractiveness.
Changing Text Color and Style
Changing the color and style of your text link can make it stand out or blend with your design. Bold and italic styles can add emphasis.
-
Color Choices: Select a color that contrasts well with your background to make your link easy to read.
-
Using Styles: Applying styles like underline or strikethrough can create visual interest and guide attention.
To change the color, select the text box, click on the “Text Color” option, and choose from the palette. For style, use the options in the toolbar, like this guide explains.
Adjusting Text Size and Font
The size and font of your text link can affect readability. Larger sizes generally make text easier to read, while a well-chosen font can convey a specific tone.
-
Size Adjustments: A clickable link should be neither too big nor too small. Balance is key.
-
Font Selection: Using simple fonts tends to work best for clarity. Avoid overly decorative styles that can make the link hard to read.
You can adjust the size and font through the toolbar. Click the text box, then modify the size and font as needed. This ensures your design maintains a professional look. If you need more help, this tutorial might be useful.
Previewing and Testing Links
It’s important to ensure that added links in a Canva design work properly. Testing the functionality and appearance of these links can help avoid issues later. Doing this will ensure a seamless experience for anyone interacting with the design online.
Accessing Preview Mode
To start, designers need to use Canva’s built-in tools to preview their work. By selecting the “Present” or “Preview” option, they can see how the design will look to viewers. This feature displays all elements, including links, as they appear in the live version.
This mode allows users to click through the design as if they were an audience. By interacting with the design in this way, designers can identify any potential issues with the links.
Ensuring Proper Link Functionality
Testing each link is crucial. Users should click every hyperlink in their design to verify that each leads to the intended destination. This includes checking links to external websites and other pages within the design. Additionally, making sure the URL is correct is key.
If any link does not function as expected, users should return to the editor to fix it. Checking the spelling and formatting of URLs can help prevent broken links. Once adjustments are made, testing should be repeated to confirm successful navigation.
Sharing Your Canva Design
Sharing your Canva designs can be done in different ways depending on your needs. You can choose to share a design directly through links or email, or you can download and export it for various uses.
Options for Sharing
When sharing a design in Canva, users have multiple choices. The easiest way to share is by using a link. In Canva, you can generate a collaboration link that lets anyone with it participate in the design process. To set permissions, you can choose between options like “Can edit” or “Can view.” This ensures that the right people have the right level of access.
For those wanting to directly involve team members, sharing via email is another useful feature. You simply add email addresses, separated by commas, into the provided field. Sharing through email allows you to connect specific teammates without providing an open link. This method ensures your design remains secure while being accessible to intended recipients.
Downloading and Exporting
If sharing through links isn’t your preferred option, downloading and exporting a design is a practical alternative.
Canva allows you to download your work in several formats, such as PNG, JPEG, or PDF, depending on how the design will be used. Each format suits different needs—PNG and JPEG for images and PDF for print-ready documents.
Before exporting, users can choose from quality and size options designed to meet specific requirements.
Higher quality might be best for printing, while lower quality could be ideal for quick web uploads.
Canva includes tailored export options like choosing specific pages or reducing file size, making it easy for designs to be applied across various platforms.