When designing with Affinity Designer, adding drop shadows can significantly enhance the visual appeal of any project. To create realistic effects, a designer can apply the outer shadow feature and adjust settings like opacity, distance, and angle. This technique adds depth and dimension, making designs more engaging.
Many designers overlook the power of shadows, thinking they complicate a simple design. However, the right shadow can elevate a design from ordinary to extraordinary. By using careful adjustments, anyone can master the art of creating lifelike shadows that complement their work.
As this blog post unfolds, readers will discover step-by-step instructions to easily implement drop shadows in their designs. From basic setups to more complex techniques, it’s all about unlocking the potential of Affinity Designer to create stunning visuals.
Getting Started with Affinity Designer
Affinity Designer is user-friendly and offers a variety of tools for creating stunning graphics. Before diving into drop shadows, it’s important to understand the interface and how to set up a document effectively.
Understanding the Interface
The interface of Affinity Designer is clean and intuitive. It features several key areas that users should familiarize themselves with:
- Toolbar: Located at the top, it contains tools for selection, drawing, and editing.
- Panels: On the right side, users find options like Layers, Colors, and Effects. These panels hold essential functions.
- Canvas: The central area where design work happens. Users can zoom in and out for detailed work.
Time spent getting to know these elements helps users navigate efficiently and enhances design speed.
Setting Up Your Document
Setting up a document correctly is crucial for effective design. Here are important steps:
-
File Type: Choose between Designer, Photo, or Publisher based on the project. Each has unique tools suited to different kinds of designs.
-
Document Size: Select the appropriate dimensions. Common sizes include A4 for print and 1920×1080 pixels for digital.
-
Color Mode: Decide on RGB for digital work and CMYK for printed projects. This choice affects color accuracy.
After these steps, the document is ready for adding elements like drop shadows effectively.
Creating Basic Shapes
Creating basic shapes in Affinity Designer is a fundamental skill. This section covers how to use default shapes and how to transform them for various design needs.
Using Default Shapes
Affinity Designer provides a variety of default shapes that can serve as the building blocks for any design. Users can find shapes like rectangles, circles, and polygons in the “Shapes” tool.
To add a shape, select the desired shape from the tool panel. Click and drag on the canvas to create it. Holding Shift while dragging will create a perfect circle or square.
Once placed, the shape can be customized using the “Transform” panel. Here, users can adjust the dimensions, position, and rotation. This flexibility helps create a strong foundation for more complex designs.
Transforming Shapes
Transforming shapes is essential for creating unique designs. After placing a shape, users can modify its size and angle using the “Transform” panel.
To resize a shape, click and drag the corner handles. Holding Shift ensures that the shape maintains its proportions. Rotating can be done by moving the circular handle that appears outside the shape.
Colors and gradients can be applied to enhance the look. Users can explore the “Fill” and “Stroke” options to change color. This transformation process empowers users to experiment with different styles and effects, making their designs dynamic and appealing.
Applying Drop Shadows
Adding drop shadows is a powerful technique that enhances the depth and realism of designs in Affinity Designer. This process involves applying effects, adjusting parameters, and fine-tuning the shadows to achieve the desired look.
Adding Layer Effects
First, the user selects the object or text that needs a drop shadow. They can do this by clicking on the layer in the Layers panel. Next, they navigate to the Effects menu and choose Outer Shadow. This action opens a dialog box where the user can select various options.
It’s important to check the Enable box to activate the effect. This will reveal additional settings to customize the shadow’s appearance. With this method, the user can efficiently add depth to any design element, making it pop against the background.
Adjusting Shadow Parameters
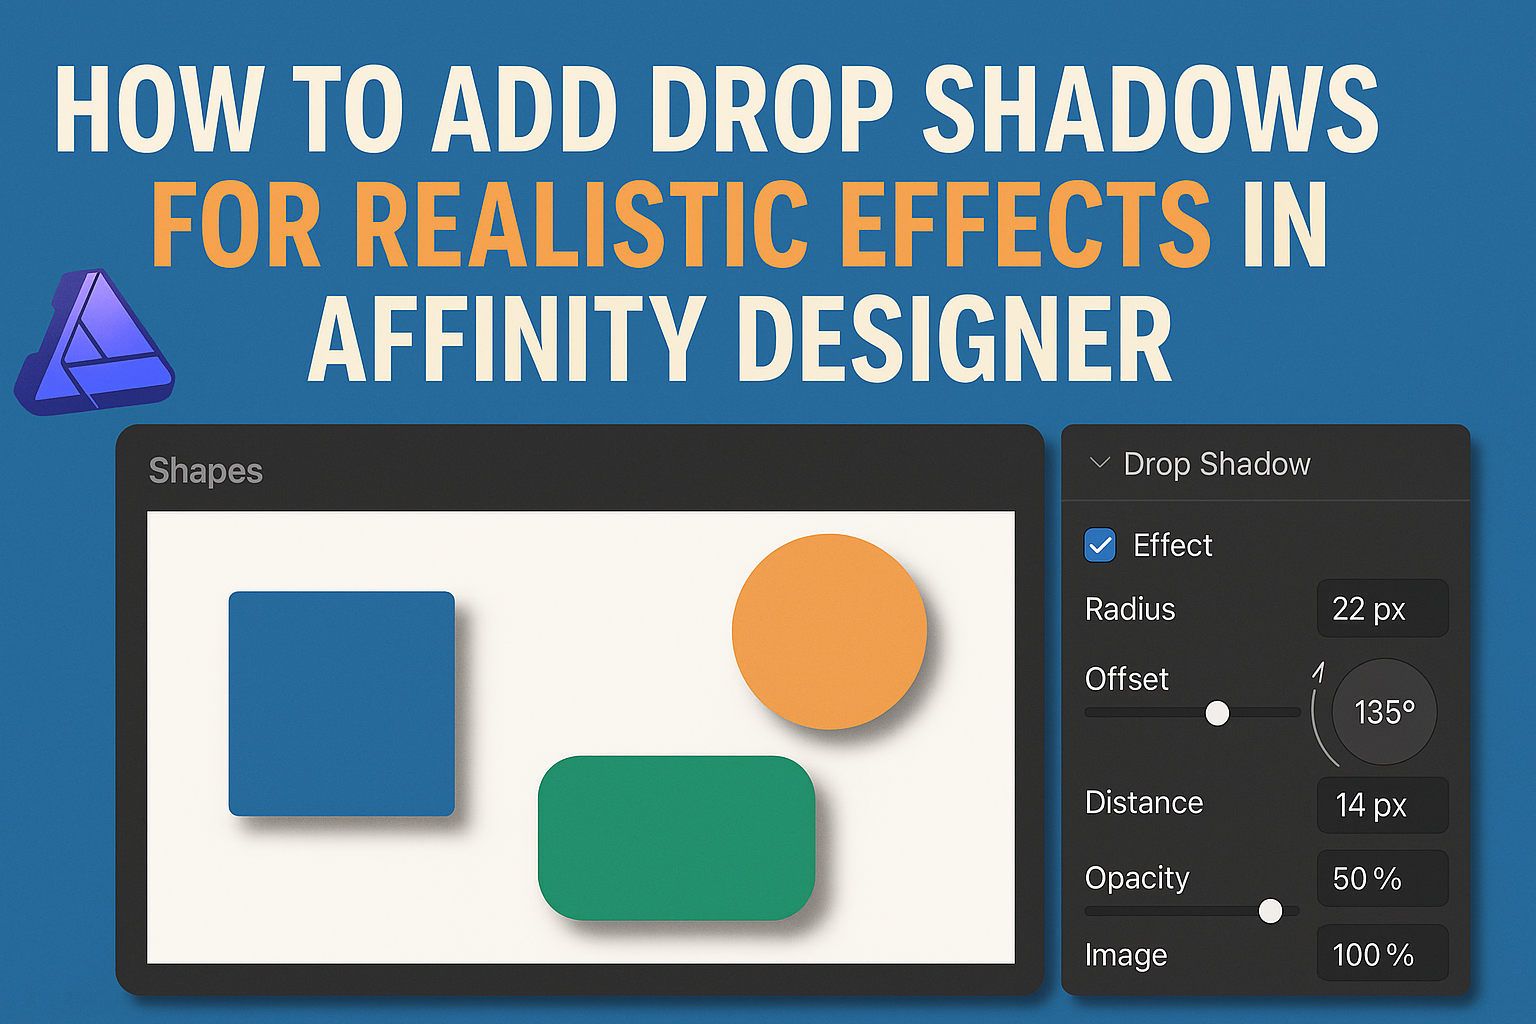
After adding the shadow effect, adjusting its parameters is essential for achieving the right look. Key settings include Distance, Size, Blur, and Color.
The user should start by setting the distance to control how far the shadow appears from the object. Next, adjusting the size influences how large the shadow looks.
Increasing the blur adds softness, which can help the shadow blend better. Finally, the color setting allows for creative choices, such as matching the shadow to a specific theme. These tweaks help fine-tune the overall realism.
Fine-Tuning with Blending Modes
Blending modes provide additional control over how the drop shadow interacts with layers beneath it. Users can find these options in the Layers panel. Common blending modes include Multiply and Overlay.
Using Multiply typically darkens the shadow, while Overlay can create a lighter, more natural effect. Experimenting with these modes helps users achieve the perfect look. It’s also beneficial to play with opacity settings to blend the shadow subtly into the design.
These adjustments make the shadows look more realistic, allowing for a unique and polished final product.
Enhancing Realism
To create more realistic drop shadows in Affinity Designer, it is essential to consider perspective and how different objects relate to each other. Focusing on layering and grouping can also enhance the overall effect, making designs look polished and professional.
Working with Perspective
Perspective plays a key role in how shadows appear in real life. It impacts how light hits an object and the resulting shadow it casts.
To simulate this in Affinity Designer, start by positioning the shadow in relation to the light source. Then, adjust the shadow’s angle to mimic how light would actually reach the object.
For instance, if the light is coming from the top left, the shadow should fall toward the bottom right.
Also, consider the distance from the object. Shadows that are closer to the object appear sharper, while those farther away look more diffused. This technique helps in creating a more believable shadow effect.
Layering and Grouping Objects
Layering and grouping help manage the complexity of designs and enhance realism.
When working with multiple elements, use layers to organize objects effectively. By placing shadows on separate layers, it allows for easy adjustments without affecting the object.
Additionally, grouping related objects can streamline the editing process.
When stacking objects, ensure that shadows correspond with the layers. For example, if a text layer sits above a shape layer, the shadow for the text should rest on the shape.
This approach creates a cohesive look that improves visual depth in the design. Using these tips can make the shadow effects more realistic and visually appealing.