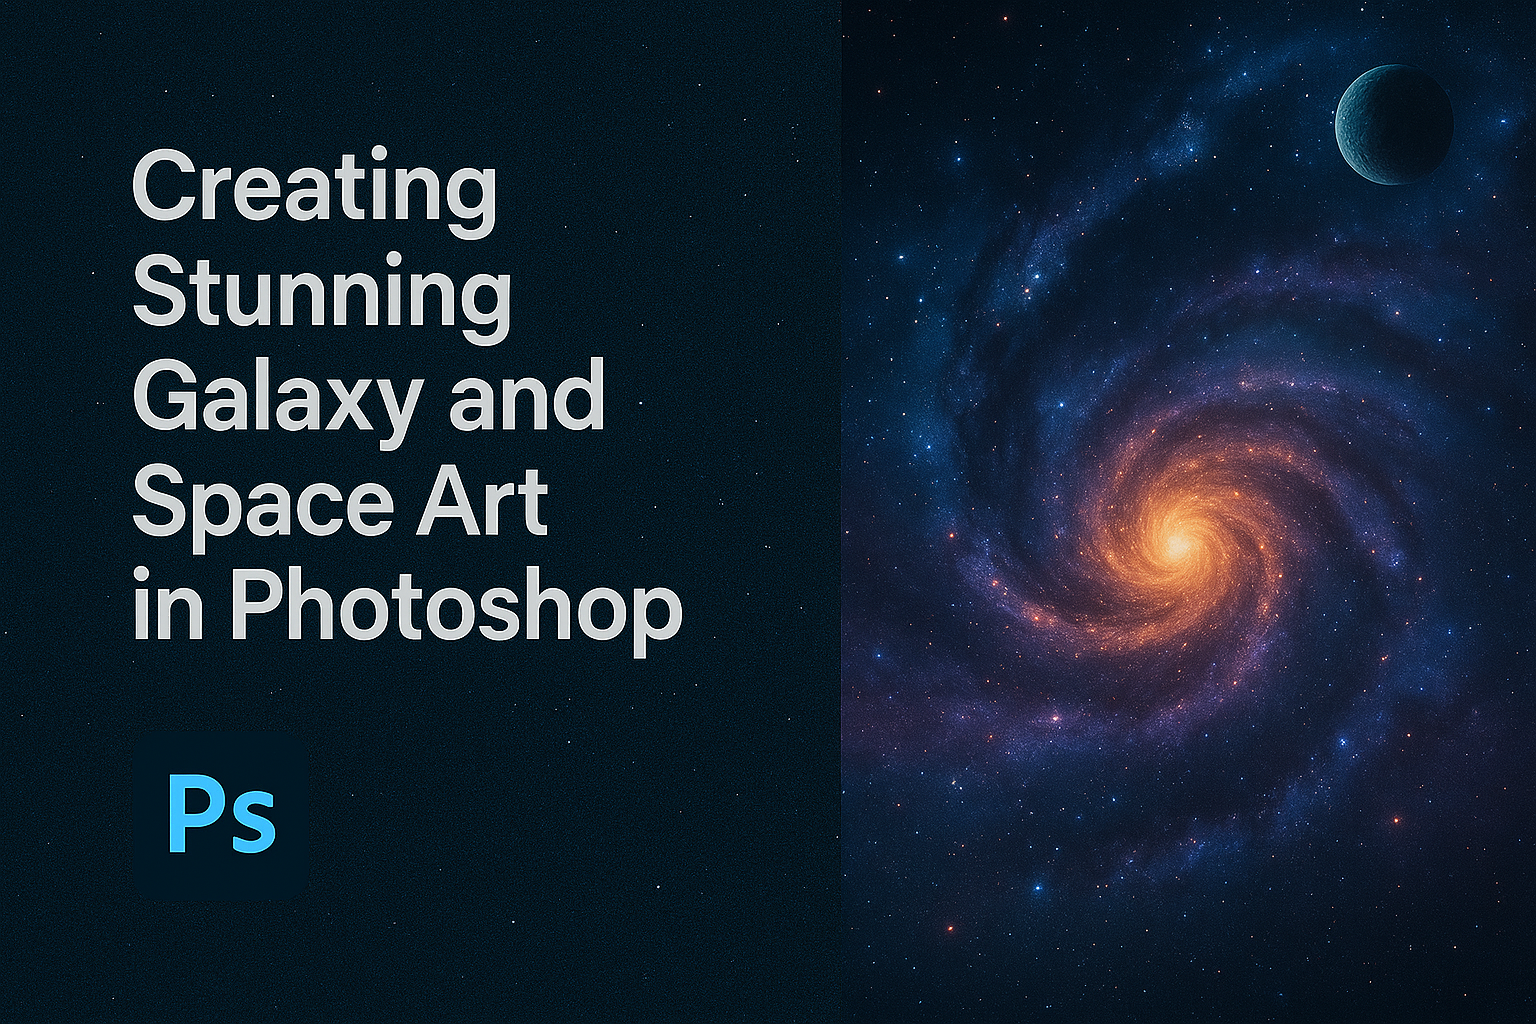
Exploring the cosmos through art can be a thrilling experience, especially when using tools like Photoshop. This powerful software enables artists of all levels to create stunning visuals, transforming their creative visions into images of galaxies, planets, and nebulae. With the right techniques, anyone can craft breathtaking space artwork that captivates the imagination.
Photoshop offers numerous resources and tools that are perfect for those wanting to create space-themed art. Brushes, actions, and overlays can help in achieving effects that mimic the vast beauty of the universe. For anyone ready to dive into creating galaxies and starry scenes, these tools make the possibilities endless.
Many tutorials and resources are available for aspiring space artists. Guides like the 40 Robust Tutorials or Cool Space and Star Resources can offer inspiration and practical steps. These resources are invaluable for those looking to bring the wonders of the universe to life in their art.
Understanding the Photoshop Workspace
Creating stunning galaxy and space art in Photoshop requires an understanding of its workspace. This includes navigating the toolbar, exploring panels and menus, and setting up the workspace for art creation.
Navigating the Toolbar
The toolbar in Photoshop is home to essential tools for creating and editing images. It usually appears on the left side, but users can move it around to fit their needs. Tools like the Brush and Eraser are critical for space art.
Each tool often has additional options shown at the top of the screen. For example, when using the Brush tool, users can adjust size and hardness. It’s helpful to get familiar with shortcut keys to switch tools quickly. Pressing “B” selects the Brush tool, and “E” selects the Eraser, making workflow smoother.
Exploring Panels and Menus
Panels in Photoshop offer extra controls, grouped by function. Important panels for space art include Layers, Adjustments, and History. The Layers panel helps users manage different parts of their work, allowing them to hide or show specific elements.
Adjustments allow tweaking of colors and contrasts, crucial when transforming images of galaxies. Keeping the History panel open helps in undoing any mistakes. Menus at the top give access to additional tools, like filters and effects, that enhance art quality.
Setting Up for Space Art Creation
Setting up the workspace for space art involves customizing settings to fit the project. Users can start by creating a new document with dimensions suitable for their final output. A typical size might be 3000×2000 pixels for high-quality imagery.
Layers are integral for building complex scenes. Setting the right resolution is also crucial; generally, 300 DPI is a good starting point. Adjust the color mode to RGB for digital art that showcases vibrant colors, which are essential in galaxy imagery.
Essential Tools and Techniques
Creating stunning galaxy and space art in Photoshop requires the right tools and techniques. Knowing how to use brushes and textures, layer blending modes, and the gradient tool can make your artwork vibrant and impactful.
Brushes and Textures
Brushes are vital for creating various cosmic elements like stars, nebulas, and galaxies. A range of brush sizes and shapes allows artists to craft detailed star fields and swirling cosmic clouds. Custom brushes can be downloaded or created to mimic the randomness of space.
Textures add depth to an image, giving nebulae and planets more life. Various texture overlays can simulate gas and dust clouds. Layer textures over painted areas for richness. Use layer masks to control texture placement, ensuring they blend seamlessly with the underlying artwork.
Layer Blending Modes
Blending modes alter how layers interact in an image, crucial for realism in space art. Modes like Screen and Overlay can make stars and bright areas pop against dark backgrounds. The Multiply mode can enhance shadows, providing depth to planet surfaces and nebulae.
Experiment with different modes to find which enhances your artwork best. Overlaying two layers with different modes can create luminous effects. By using blending modes, artists can easily adjust brightness and contrast levels, achieving desired looks without drastically altering the base colors.
Gradient Tool for Atmosphere
The gradient tool is essential for creating seamless transitions between colors, perfect for atmospheric effects in space art. Gradients can mimic the glowing halos of stars or the subtle shifts from night to dawn on a planet’s horizon. Linear or radial gradients can both be effective, depending on the scene.
Using gradients, you can add a sense of depth or motion. You can fade from dark purples to light blues to create a misty galactic backdrop. By applying gradients strategically, artists can guide viewers’ eyes through the composition, adding drama and aesthetic balance to the scene.
Creating Your Galactic Canvas
Creating a galaxy in Photoshop involves imagination and understanding of key techniques. It starts with a concept that guides the design, followed by building a space-themed background, and finishing with adding stars and nebulae to complete the scene.
Starting with a Concept
Every artwork begins with an idea. When creating galaxy art, it’s important to decide the style and feel of the piece. Consider whether it will be realistic or more fantastical.
Sketching ideas on paper or using digital tools can help shape this vision. Think about the colors and other elements such as planets or comets. Using references from space photography can provide inspiration and realistic details.
Visualize how different elements like color gradients and lights will interact in your final piece. Once the concept is solid, it’s easier to progress to the next steps.
Building the Background
A strong background sets the mood. Begin with a dark canvas to mimic space. Use gradients to mimic the vastness of the galaxy, transitioning from deep blacks to soft purples and blues.
Applying textures can add depth. For example, using a space texture on a new layer and setting it to modes like Screen or Overlay helps blend colors. Soft brushes painted with reds and purples bring subtle shifts in hue.
Layers can be used to enhance these effects. Experiment with various brush sizes and opacities to create a diverse background that supports the natural composition of the galaxy.
Adding Stars and Nebulae
Stars and nebulae give life to galaxy art. To create stars, select a small soft round brush, scatter them across the canvas, and adjust sizes for variety.
Highlight star clusters using layers with color dodge mode. For nebulae, use the Lasso Tool and Cloud filters to create misty, colorful patterns.
Blend these elements using soft brush strokes or gradients with lower opacities to create a natural appearance. Adjusting layer opacity and using filters will add realism and atmosphere. Using different colors and flow will create stunning galactic visuals that add to the artwork’s beauty.
Crafting Planets and Moons
Creating planets and moons in Photoshop involves crafting realistic spheres, applying textures to simulate planetary surfaces, and designing impact craters. Each step is essential for achieving a true-to-life look that captivates viewers.
Designing Realistic Spheres
To start, creating a basic sphere provides the foundation for any planet or moon. Use the Elliptical Marquee Tool to create a perfect circle. Fill it with a base color, which will serve as the planet’s surface.
Apply lighting effects to give the sphere a 3D look. The Filter > Render > Lighting Effects option allows you to adjust highlights and shadows. This step is crucial to add depth and make the sphere appear more three-dimensional.
Layer styles like Inner Shadow or Bevel and Emboss add additional realism. Adjust these settings until the sphere’s surface looks smooth and rounded. This process creates the illusion of curvature and is important for setting up the base of your planet or moon.
Texturing Planetary Surfaces
Textures bring planets to life by adding detail to their surfaces. Start by selecting a high-resolution image of a texture, such as rock, desert, or ice. Drag this texture over your sphere and apply it as a new layer.
Use blending modes like Overlay or Multiply to ensure the texture blends naturally with the base color. Try adjusting opacity for a more subtle effect. This makes sure the texture looks like part of the planet rather than an overlay.
For personalized texture, create custom brushes with specific patterns. Custom brushes can add craters, canyons, and other natural features unique to your vision. This flexibility allows for a more creative and tailored planetary surface.
Creating Impact Craters
To simulate impact craters, begin with creating a circular selection on the textured sphere. Feather the edges and fill it with a darker shade to simulate depth. This gives the impression of a concave surface.
Apply Inner Shadow and use the Smudge Tool to make rough, jagged edges. This technique enhances realism by mimicking the irregular surface of an actual crater. Adjust the opacity and blur for a smoother transition between shades.
Layer multiple craters of various sizes randomly across the sphere. This step creates the chaotic impact patterns seen on the surfaces of moons and planets, adding authenticity to your design.
Lighting and Color Adjustments
In creating galaxy and space art, adjusting light and color plays a crucial role. Mastering these elements can enhance depth, realism, and mood in your artwork. This section covers the basics of handling light sources, applying color corrections, and utilizing adjustment layers effectively.
Working with Light Sources
In space art, light sources can add depth and drama. Artists often start by identifying the primary light source. This could be a star or another celestial body. Using Photoshop, add a new layer set to “Screen” mode and use a soft brush to paint light. This technique helps in highlighting areas that need more glow.
Experiment with different shades of light to create a natural effect. Cooler tones might mimic distant starlight while warmer tones can simulate sunlight. Balancing these tones ensures the light appears soft and diffused, blending naturally into the scene.
You can also introduce secondary light sources to build complexity. This involves using smaller, focused brushes to apply light in specific areas. These accents can simulate the scattered light reflections on nearby objects or create a halo effect around bright stars.
Color Correction for Depth
Color correction is essential for adding depth. The use of color can transform a flat image into a vivid, 3D-like scene. Employ color balance tools to adjust the tones of various elements in your artwork.
Photoshop’s “Color Balance” adjustment layer allows fine-tuning. By shifting the midtones, highlights, and shadows toward desirable hues, a more cohesive color scheme emerges. It’s crucial to maintain a balance between vibrant and muted colors to avoid overwhelming the scene.
Incorporating complementary colors improves the overall impact. For instance, mixing cool blues with warmer oranges can create an engaging contrast. This helps in distinguishing different features like planets, stars, and nebulae, each having its own distinct hue yet forming an integral visual story.
Using Adjustment Layers
Adjustment layers are powerful tools for enhancing space art. They allow non-destructive edits, meaning you can tweak the artwork’s appearance without directly altering the original layers. This flexibility is key when exploring different effects and styles.
The “Curves” adjustment layer is particularly useful for managing brightness and contrast. Applying it can highlight or subdue specific elements, improving the overall balance. Softening bright areas while enhancing darker ones adds a dynamic range to the scene.
Another effective technique is using “Hue/Saturation” adjustment layers. This helps in refining color intensity and saturation, making certain elements pop. Changing saturation levels selectively can direct focus towards specific features, such as the vividness of a galaxy against a darker background.
Adding Final Touches
Bringing your galaxy art to life involves carefully integrating extra elements and effects. Adding comets and asteroids can enhance realism, while fine-tuning composition with effects ties the whole scene together. Using sharpen and blur tools for finishing creates depth and focus.
Incorporating Comets and Asteroids
To add a dynamic touch, incorporate comets and asteroids. These elements can be created using basic circle and path tools in Photoshop. Adjust the size and shape to match their distance and speed. Use the Gaussian Blur filter to create movement trails, mimicking a natural look.
Consider the origin and path of these elements. Place comets strategically to guide the viewer’s eye across the composition. Asteroids should vary in size and brightness, suggesting different distances from the viewer.
Color choices are vital. Use cooler tones for distant asteroids and warmer, brighter colors for closer comets. This technique will add interest and depth to the scene.
Enhancing the Composition with Effects
Enhancing your space scene with effects can be a game-changer. Begin by adding layer effects like outer glow and color overlay to enrich stars and other celestial objects. These techniques can imbue the scene with a sense of magic and wonder.
Consider using adjustment layers such as Selective Color or Photo Filter. Adjust the hue and saturation to highlight specific features or set the mood. For instance, cooler shades might evoke a calm, starry night.
Try using overlay textures for added realism. Use gentle textures to mimic space dust or distant galaxies. These can be adjusted using blending modes like soft light to ensure they blend seamlessly with the original image.
Finishing with Sharpen and Blur Tools
Finish your artwork with the sharpen and blur tools to add clarity and focus. The sharpen tool helps bring out details in key areas like bright stars or nebulae, making them stand out and catch the viewer’s attention.
Blurring background elements can create a sense of depth by simulating the effect of a camera focus. Tools like the Lens Blur can be particularly effective. Apply these adjustments selectively to enhance the central composition without over-softening important features.
Balancing the sharpness and blur elements is key to a professional-looking space scene. This balance helps achieve a natural and captivating focus within the image.
Exporting and Sharing Your Art
When you’ve finished your galaxy or space art in Photoshop, the next steps involve exporting and sharing it. It’s important to optimize for both print and digital platforms and to consider ways to protect your art.
Optimizing for Print
To ensure your artwork looks great in print, start by checking the resolution. Art should be set to 300 DPI for clear, high-quality prints. Adjust the color mode to CMYK, which is standard for printing. This ensures colors appear correctly on paper.
When exporting, save the file in a format like TIFF or PDF. These formats are preferred by printers because they maintain high quality and support layers.
Consider the print size. Resize your image based on where it will be displayed. If it’s a poster, large dimensions are necessary, while smaller pieces like postcards require adjustments.
Saving for Web and Social Media
For sharing online, it’s crucial to consider file size and clarity. Start by saving the artwork in JPEG or PNG format. These formats balance quality and file size, making them ideal for uploading online.
Adjust the resolution to 72 DPI for web use. This setting optimizes the file for faster load times without losing visible quality on screens. Before sharing, resize your image to adapt it to platform requirements; for instance, Instagram prefers square images of 1080×1080 pixels.
Use tools like the “Save for Web” feature in Photoshop, which helps you preview how the art will look across different platforms. This feature allows you to tweak quality settings before saving.
Protecting Your Work with Watermarks
Adding a watermark to your artwork helps deter unauthorized use. It’s a simple step to take before sharing your art online. In Photoshop, create a text layer with your name or brand and adjust the opacity so it’s visible but not distracting.
Place the watermark in a consistent spot, like a bottom corner, to maintain a professional look. This placement still protects the work but keeps the focus on the art itself.
Consider using a more complex watermark design, like a semi-transparent logo. This adds a unique touch and further secures your work.