Making a professional business card can be a fun and creative task. With Easil, it becomes an easy project that anyone can manage.
Using customizable templates and a user-friendly editor, anyone can create a standout business card that reflects their brand and personality.
Designing a business card doesn’t have to be complicated or overwhelming. Easil offers numerous templates that allow individuals to upload logos, change colors, and select fonts with just a few clicks.
This way, they can focus on what matters most—making a lasting impression.
Whether for networking opportunities or personal branding, a well-designed business card is essential. Easil provides the tools needed to craft a unique card that will attract attention.
With this guide, readers will discover how to leverage Easil to create the perfect business card effortlessly.
Understanding Business Card Essentials
Creating a professional business card involves several key elements. By focusing on the purpose, dimensions, and design choices, one can make a card that stands out and effectively communicates information.
Purpose of a Business Card
A business card serves as a personal marketing tool. It provides essential contact information, like name, phone number, email, and company logo.
A well-crafted card can create a strong first impression and is often the first interaction potential clients have.
Beyond just providing contact details, the card conveys the brand identity. It reflects professionalism and can spark interest in the services offered. A memorable business card can lead to further conversations and opportunities.
Standard Dimensions and Bleed
Standard business cards typically measure 3.5 x 2 inches. This size is widely accepted and fits easily into wallets or cardholders. It is crucial to maintain this standard to ensure a professional look.
When designing, consider the bleed area, which is the space beyond the actual card size where design elements extend. This prevents unintentional white borders when cards are cut.
A common bleed margin is usually 0.125 inches around the edges.
Choosing the Right Font and Color Scheme
Selecting the right font and color scheme is essential for effective communication.
The font should be easy to read and reflect the brand’s personality. Sans-serif fonts often appear modern, while serif fonts can convey tradition and trust.
Color plays a critical role in catching attention. It is important to choose colors that align with the brand identity.
A common practice is to limit the palette to two or three colors to keep the design clean and professional. Contrasting colors for text and background improve readability.
Designing Your Business Card
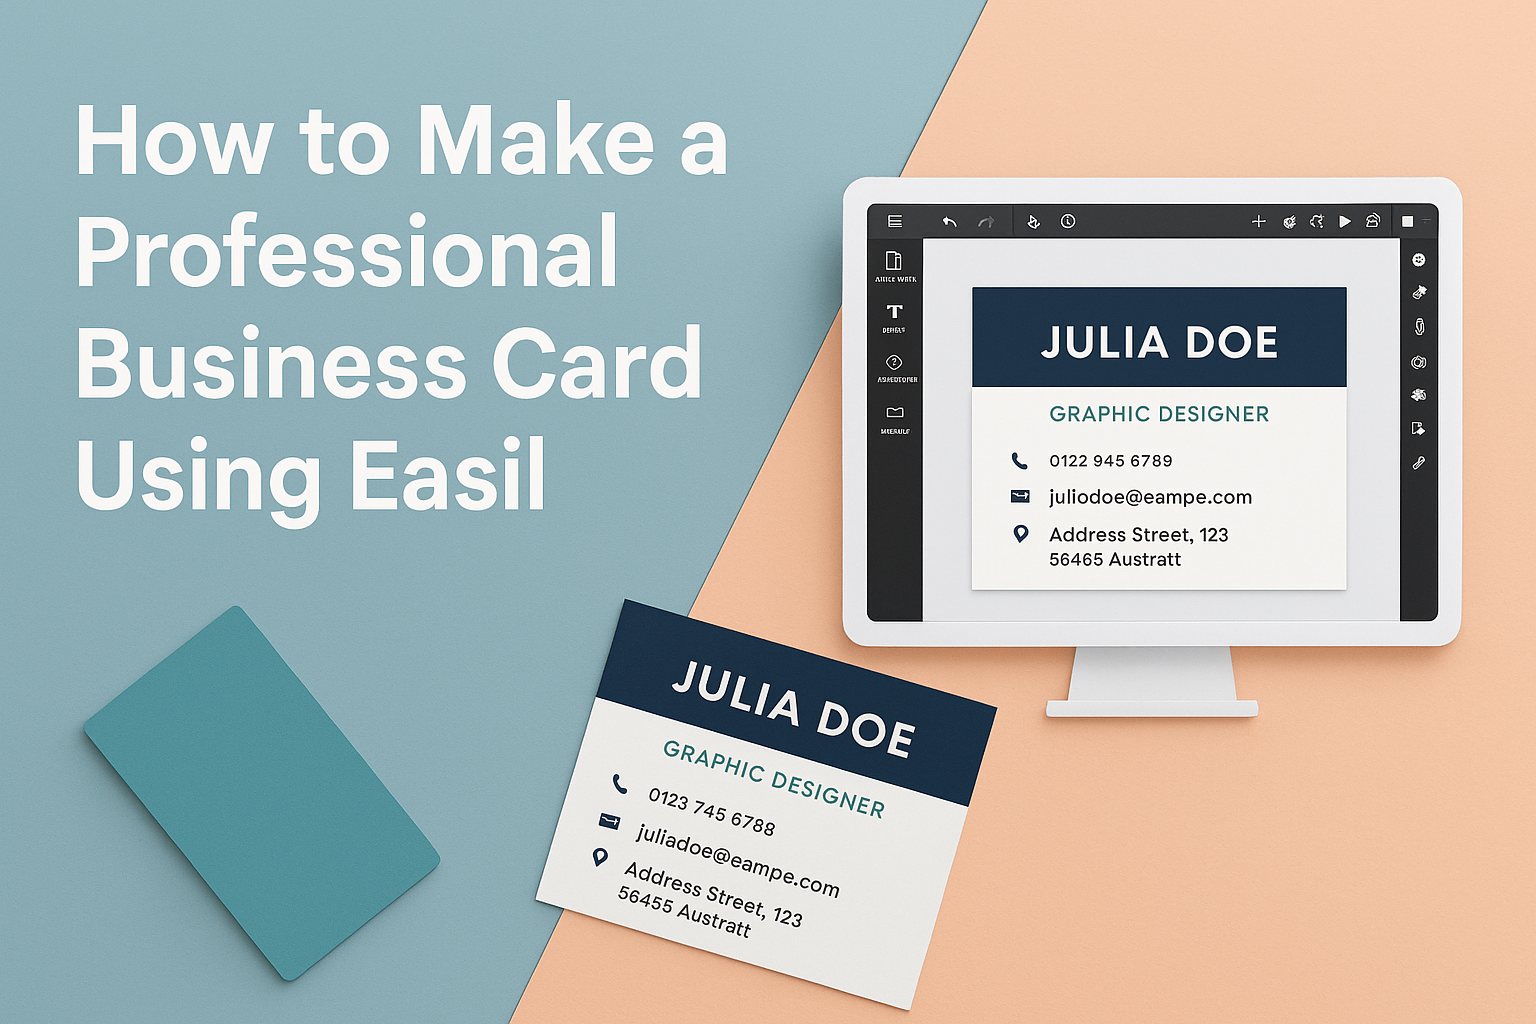
Creating a professional business card in Easil involves several important steps. It starts with selecting the right template, followed by customizing design elements, incorporating a logo, and strategically adding contact details. Here’s how to do it.
Selecting a Template in Easil
To begin, choosing the right template is crucial. Easil offers a variety of templates that suit different industries and styles. Take time to browse options and look for something that reflects the brand’s personality.
Once a template is selected, it can easily be customized. Check the layout and design elements to ensure they fit well with the intended message.
Users can filter templates by categories like “Modern,” “Minimal,” or “Creative” to find the perfect match.
Remember to consider the card’s size and orientation too. A well-organized layout can make a big difference in how the card is perceived.
Customizing Your Design Elements
After selecting a template, it’s time to customize the design. Easil allows users to modify colors, fonts, and layouts easily.
It’s important to align these elements with the brand identity.
Changing font types can add personality. A bold sans-serif might work for tech companies, while a sleek serif may be better for law firms.
Colors also play a huge role. Use brand colors to maintain consistency. This not only enhances visual appeal but also promotes brand recognition.
In addition, ensure that design elements do not overcrowd the card. Clear space is vital for a clean and professional look.
Incorporating Your Brand Logo
Adding a logo is one of the key steps in designing a business card. The logo should be placed prominently on the card, often at the top or center.
Easil allows users to upload their logos easily, making this process straightforward.
It’s essential that the logo is high-quality to avoid pixelation. This ensures it looks sharp and professional.
The size of the logo matters too. It shouldn’t overshadow other essential information, like the name and contact details.
Make sure the logo’s colors harmonize with the entire card design. When done right, it can enhance the overall aesthetic and strengthen brand identity.
Adding Contact Information Strategically
Finally, including contact information is crucial for any business card. Start with the person’s name and title, followed by the company name. Then, include phone numbers, email addresses, and social media links if applicable.
Placement of this information matters. The most important details should be the most visible.
Users can group information logically, making it easy to read.
Consider using icons for phone or email. This reduces text clutter and maintains a clean look.
Always proofread the information before printing. Any mistakes can lead to confusion and lost business opportunities. Ensuring accuracy in contact details is vital to making a good impression.
Finalizing and Printing
Before printing business cards, it’s vital to ensure that the design is perfect. Careful adjustments can make a big difference in the final product. Considering print quality and options is equally important to achieve the desired outcome.
Preview and Adjust the Layout
The first step in finalizing a business card is previewing the design. Easil allows users to see how their business card will look before printing. This helps identify any elements that need adjustment.
Check for alignment issues and spacing. Make sure the text is easy to read and the colors complement each other.
Adjust the card’s layout until it meets the desired look. It is also essential to proofread the information for any typos or mistakes.
Using the revision tools in Easil can significantly enhance the design. The user can zoom in to spot small details and make necessary changes.
Previewing the card ensures that it will make a great impression when handed out.
Choosing the Right Paper Quality
Choosing the right paper quality is essential for a professional look. A thicker card stock often feels more substantial and impressive. Standard paper might bend easily, while high-quality stock provides durability.
Easil offers various paper options to choose from. Options range from matte to glossy finishes. A matte finish often gives a sleek, understated elegance, while glossy can make colors pop.
It’s important to consider how the card will be used. If it will be in a wallet, a thinner card might suffice. For networking events, thicker stock can convey professionalism.
Selecting the right paper quality enhances the overall perception of the brand.
Printing Options and Considerations
When it comes to printing, users have a few options. They can choose to print at home or use professional services.
Each has its advantages and considerations.
Printing at home can be convenient, but the quality may vary.
It’s crucial to use a high-resolution printer with appropriate settings. This ensures that color and detail will look sharp.
On the other hand, professional printing services often offer higher quality. Users can select from various finishes and paper types.
It’s also important to consider the turnaround time and cost.
Comparing these options helps users make the right decision for their business cards.