Mastering layers and groups in Gravit Designer can take a design project from chaotic to organized. Using these tools effectively allows designers to manage their projects more easily, making it simpler to edit and refine each element.
This approach not only saves time but also enhances creativity by letting designers focus on individual components without distraction.
Layers act like transparent sheets stacked on top of each other, while groups bundle elements together for easier manipulation. By understanding how to use these features, designers can create cleaner layouts and streamline their workflows.
This article will guide readers through the process of setting up and managing layers and groups in their designs.
With practical tips and insights, anyone can improve their design process in Gravit Designer. By the end, they will feel more confident in organizing their work, leading to more polished and professional results. Embracing layers and groups is a key step in any designer’s journey to success.
Getting to Know Gravit Designer
Gravit Designer is a powerful design tool that helps users create stunning graphics easily. By understanding its interface, layers, and groups, designers can work more efficiently.
Understanding the Interface
Gravit Designer has a user-friendly interface that is easy to navigate. The main workspace features a canvas where designs come to life.
On the side, there are panels for layers, styles, and properties. These panels allow users to customize and adjust their designs quickly.
At the top, the menu bar provides options for file management and design tools. Familiarizing oneself with these elements can make the design process smoother.
The Basics of Layers
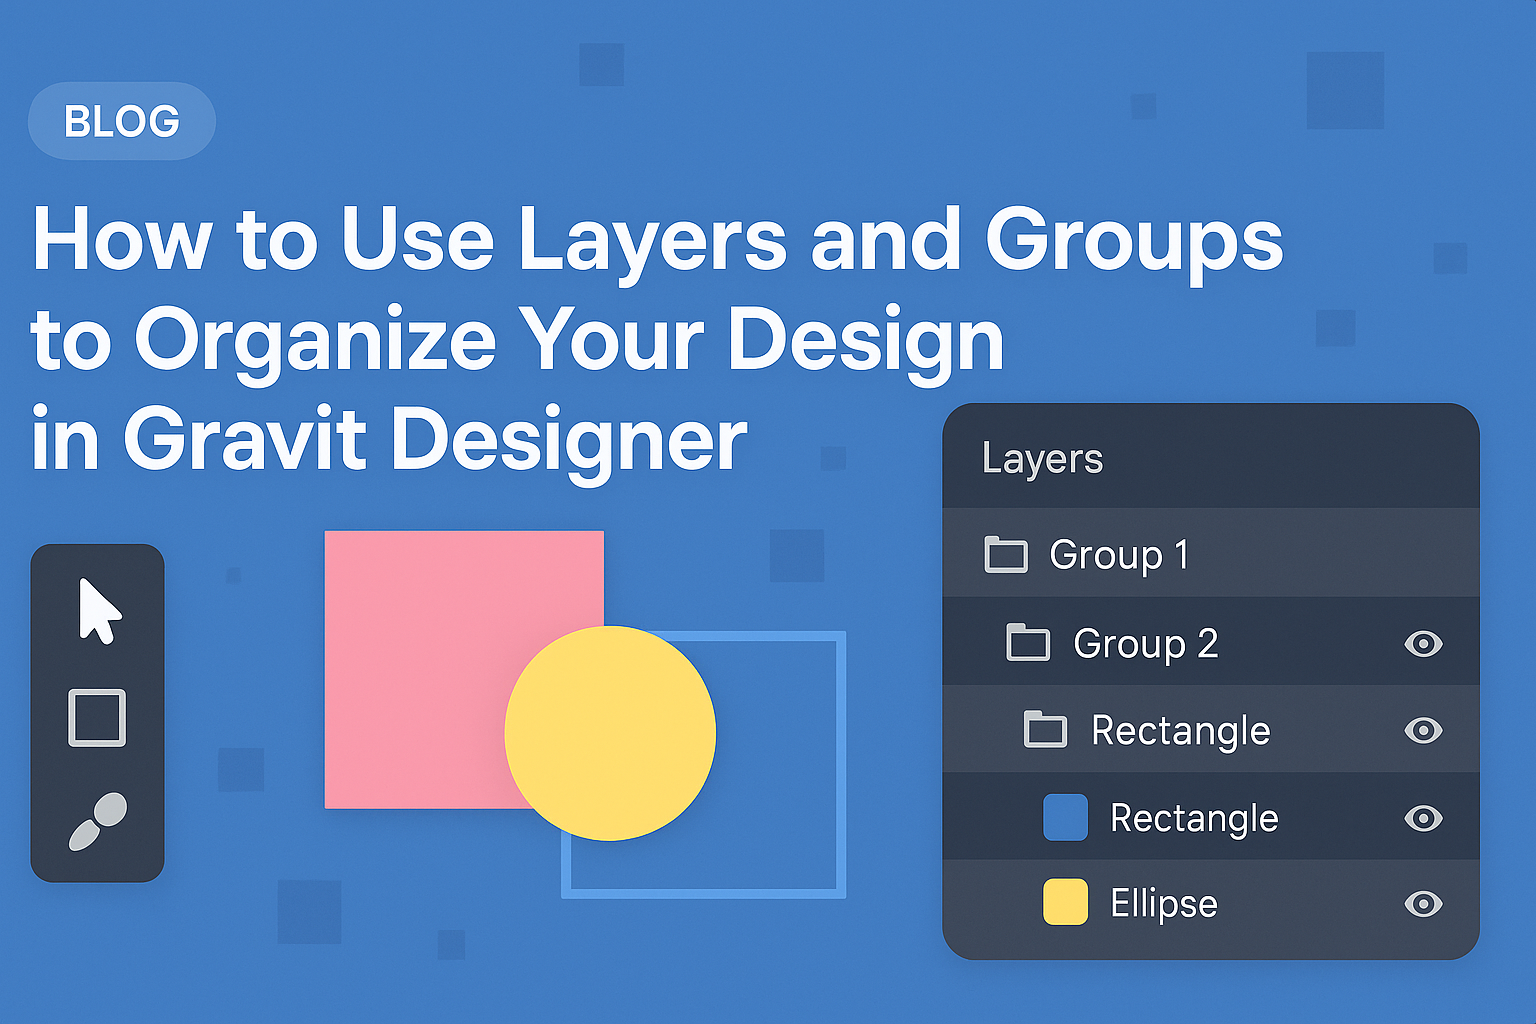
Layers are essential in Gravit Designer for organizing different elements. Each layer acts like a sheet of paper stacked on top of each other.
This system allows users to keep elements separate, making it easier to edit individual parts. For example, text can be on one layer while images stay on others.
Users can rename layers, change their order, or hide them as needed. Custom colors can also be assigned to layers, helping to visually separate them. This feature enhances productivity and keeps projects tidy.
Groups and Their Purpose
Groups in Gravit Designer help to organize multiple layers into one unit. This is useful for managing complex designs with many elements.
To create a group, users can simply select the desired layers and group them together. Once grouped, moving or adjusting the entire set becomes easier.
This function also keeps the design interface clean. It minimizes clutter by reducing the number of visible layers. Users can expand or collapse groups as needed for better visibility.
Organizing Your Design
Effective organization is key to a clean and efficient design workflow in Gravit Designer. By using layers and groups wisely, designers can keep their projects manageable and easy to navigate. This section will explore creating layers, grouping elements, and managing these components effectively.
Creating Layers
Layers are essential for keeping different parts of the design separate. In Gravit Designer, each new element automatically generates a layer. To create a new layer, users can go to the Layers panel and select the “Add Layer” option.
It’s beneficial to label each layer descriptively. This practice helps identify what each layer contains, making it simpler to locate specific elements later on. For instance, layers can be labeled as “Background,” “Text,” or “Images.”
Using color coding for layers can enhance organization. Color coding helps differentiate between various sections, allowing for quicker edits and adjustments. This method streamlines the design process significantly.
Grouping Elements
Grouping related elements is another effective way to organize a design. When elements are grouped, they can be moved or transformed together, which saves time. In Gravit Designer, selecting multiple elements allows users to right-click and choose “Group.”
Once grouped, users can also rename the group for clarity. For example, a group of icons can be named “Social Icons.” This helps maintain a tidy Layers panel.
Grouping is especially useful when working on complex designs with many components. It creates a structure that makes adjustments more straightforward, whether moving or resizing groups as a whole.
Layer and Group Management
Managing layers and groups efficiently ensures a smooth workflow. Users should regularly review their Layers panel. This practice helps to remove any unnecessary layers or groups. A clutter-free panel is easier to navigate.
Sorting layers and groups hierarchically can also be helpful. Keeping related items together simplifies finding and editing elements. It is beneficial to keep the hierarchy meaningful, perhaps by arranging elements from back to front.
Finally, utilizing shortcuts can speed up layer and group management. Learning common commands can greatly enhance a designer’s efficiency.
Advanced Techniques
Using layers and groups effectively can take design projects to the next level. This section explores valuable methods, including blending modes, designing with clipping masks, and using isolation mode for editing groups.
Layer Blending Modes
Layer blending modes allow designers to control how layers interact with each other and create unique visual effects. Each blending mode applies a specific mathematical formula to combine layer colors. This can enhance images or create stunning graphics.
Some popular blending modes include:
- Multiply: Darkens the layer colors by multiplying them with the layer below.
- Screen: Lightens the colors, making bright areas more pronounced.
- Overlay: Combines Multiply and Screen, adding depth and contrast.
To apply a blending mode, select the desired layer and choose the mode from the dropdown menu in the layers panel. Experimenting with different modes can lead to creative results.
Designing with Clipping Masks
Clipping masks enable designers to control which parts of a layer are visible based on the shape of another layer. It’s an effective way to create complex designs without permanently altering the original elements.
To create a clipping mask, follow these steps:
- Place the layer you want to use as a mask above the layer you want to crop.
- Right-click on the mask layer and select “Use as Clipping Mask.”
Isolation Mode for Editing Groups
Isolation mode simplifies working with groups of layers. It lets designers focus on a particular group without editing other elements in the design.
This is helpful when needing to make precise adjustments.
To enter isolation mode:
- Double-click on the group or right-click and select “Enter Isolation Mode.”
- Make changes to the group’s layers without affecting the rest of the project.
Exiting isolation mode is easy—just click outside the group. This feature enhances workflow efficiency, especially in complex designs with multiple layered elements.