Adding a vignette effect to photos in Canva can enhance their appeal and draw attention to the subject. This effect subtly darkens or lightens the edges of an image, creating a soft focus that makes the center stand out.
It’s a simple technique that can elevate any picture, making it perfect for personal projects or professional presentations.
Canva makes it easy for anyone to create this effect with just a few clicks. With its user-friendly interface, even those new to graphic design can achieve stunning results.
This guide will walk you through the steps to apply a vignette effect, giving your images a polished and artistic touch.
Whether for social media, a blog, or a personal scrapbook, mastering the vignette effect can add a professional flair. With the right tools and techniques, anyone can transform ordinary photos into captivating visuals.
Getting Started with Canva
Canva is a friendly and easy-to-use platform for creating stunning graphics. By signing up and learning how to navigate its features, anyone can enhance their photos with the vignette effect.
Signing Up and Navigating the Interface
To begin, the user needs to sign up for a Canva account. They can do this by visiting the Canva website and clicking on the “Sign Up” button.
It’s simple; just enter an email address, create a password, or sign up using a Google or Facebook account.
Once signed in, the user will see the Canva home page. Here, they will find a range of templates and design options.
The left sidebar is particularly useful, as it provides quick access to projects, templates, and other features. Users can also search for specific designs or tools by using the search bar at the top.
Familiarizing oneself with this interface makes navigating and creating designs much smoother.
Choosing the Right Photo for Vignette
Selecting the right photo is crucial for a great vignette effect. The user should look for images that stand out and allow for mood enhancement. Photos taken during golden hour or with interesting subjects can work well.
It’s also important to consider the picture’s composition. Images with clear focal points can benefit more from the vignette effect, as this will draw attention to the subject.
Users can upload their own photos or choose from Canva’s extensive library. When using a photo, ensure it fits the desired style, as this will enhance the final result.
Creating the Vignette Effect
To create a vignette effect in Canva, the user will first focus on adjusting the brightness and contrast of the image. After enhancing the image, they can then apply vignette filters to achieve the desired look. Both steps are essential for a polished final image.
Adjusting Image Brightness and Contrast
To start, it is important to adjust the brightness and contrast of the image. This makes the photo more visually appealing.
- Select the Image: Click on the image in the Canva editor.
- Edit Image: Click the “Edit Image” button on the toolbar.
- Adjust Brightness: Use the brightness slider to increase the light or darken the photo.
- Modify Contrast: Adjust the contrast slider to enhance the difference between light and dark areas.
This helps to create a better foundation for the vignette effect. A well-adjusted image will show off the vignette beautifully and create a nice focus on the central subject.
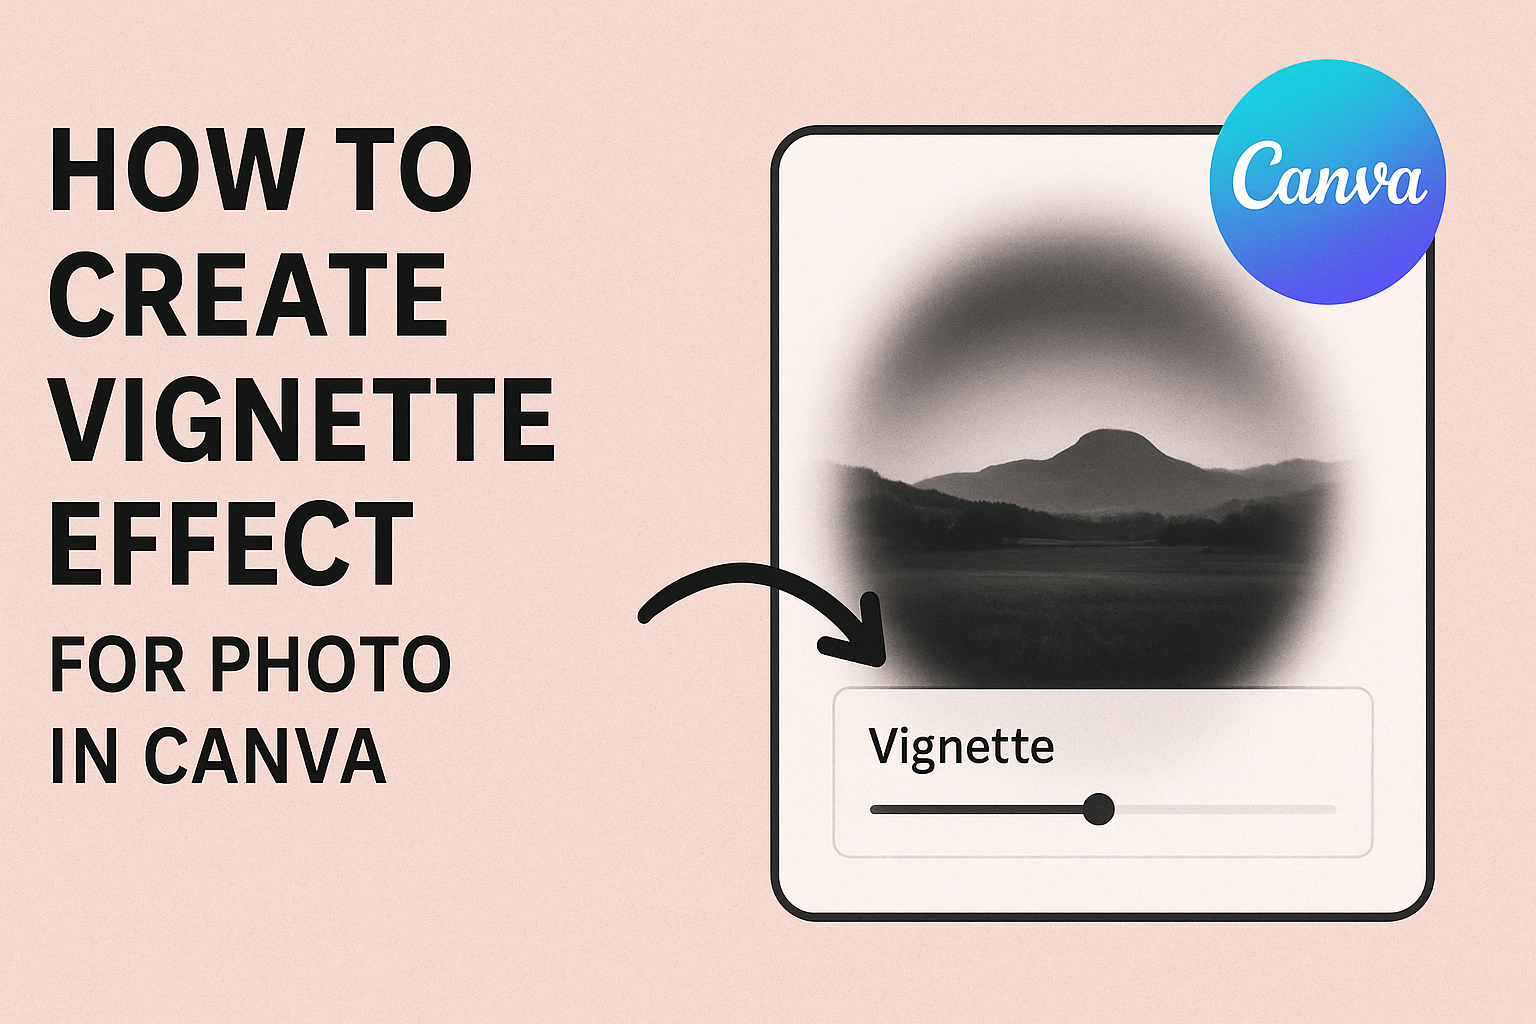
Applying Vignette Filters and Effects
Once the image is adjusted, the user can apply the vignette effect. This adds a dramatic look that draws attention to the center of the photo.
- Access Effects: Click the “Effects” tab in the editor.
- Find Vignette: Scroll through the effects until “Vignette” appears.
- Select Vignette: Click on it to apply the effect to the image.
After applying, the user can customize it using the strength slider. Adjusting this slider allows for a subtle touch or a bold statement. This step elevates the photo, making it ready for sharing or printing.
Fine-Tuning Your Vignette
Fine-tuning the vignette can greatly enhance the look of a photo. Adjusting the degree of vignetting and customizing the color can lead to a perfectly edited image that suits the user’s style.
Customizing the Degree of Vignetting
To adjust the degree of vignetting, the user can go to the Effects tab in Canva after selecting the image. There will be a slider or input box for the vignette effect.
-
Increasing Vignetting: By moving the slider to the right, the user darkens the edges, drawing attention to the center of the image. This can help create a dramatic focus.
-
Decreasing Vignetting: Moving to the left lessens the effect, resulting in a softer look. This is great for a light, airy feel.
Experimenting with different settings allows users to find the right balance that complements the image’s subject.
Changing the Vignette Color and Opacity
Changing the color and opacity of the vignette adds uniqueness to the project. Users can click on the color box in the Vignette settings.
-
Selecting a Color: Users can pick from the color palette or enter a hex code for precise control. A warm color can create a vintage look, while cooler tones offer a modern feel.
-
Adjusting Opacity: The opacity slider controls how noticeable the vignette effect is. Setting it to a lower percentage can create a subtle enhancement, while higher settings provide a bold appearance.
This flexibility lets users match the vignette to the mood of their photo perfectly.
Saving and Sharing Your Edited Photo
After creating a vignette effect in Canva, the next steps involve saving and sharing the edited photo. Knowing the best ways to export and distribute the image can enhance its visibility and usability across different platforms.
Exporting Options for Your Vignette Photo
Canva offers several exporting options that cater to different needs. Once the edit is complete, the user can click on the “Download” button in the top right corner.
They can choose different file formats, such as PNG, JPG, or PDF.
- PNG is ideal for high-quality images with transparency.
- JPG is perfect for standard photo sharing with smaller file sizes.
- PDF is useful for print-ready layouts.
It is also possible to adjust the image quality settings for optimal results. After selecting the format, clicking “Download” saves the photo directly to their device.
Sharing Your Photo on Social Media Platforms
Sharing the edited photo on social media is easy with Canva. After exporting, the option to share directly to various platforms appears.
Users can connect their social media accounts, such as Facebook, Instagram, or Twitter, directly to Canva. This allows for quick posting without needing to upload manually.
- They can add captions and hashtags to reach a broader audience.
- It’s also useful to tag friends or locations for engagement.
For those who prefer, they can also copy the image link and share it via messaging apps or email. This flexibility helps ensure that the edited photo gets the attention it deserves.