Creating a pricing table can seem daunting, but it doesn’t have to be complicated.
Easil makes it easy to design a simple and clean pricing table that attracts customers and clearly displays your offerings.
By following a few straightforward steps, anyone can build a professional-looking table that enhances their website.
In this article, the reader will discover helpful tips on using Easil’s user-friendly interface. From selecting templates to customizing layouts, this guide will cover everything needed to create a pricing table that stands out.
Readers will gain insights into how effective design can elevate their pricing strategy and improve customer engagement. With the right approach, they can make pricing information accessible and appealing for their audience.
Understanding Pricing Tables
Pricing tables serve as a quick and effective way to present options to potential customers. They help users to compare features, benefits, and prices at a glance, making the decision process easier.
The Purpose of a Pricing Table
The main goal of a pricing table is to simplify decision-making for customers. It presents multiple pricing plans or products side by side, allowing users to see the differences clearly. This visual comparison helps users quickly identify which option suits their needs best.
A well-designed pricing table can increase conversions. When customers understand the values of each plan, they are more likely to make a purchase. It removes confusion and highlights the most important features, making it easier for users to select a pricing tier.
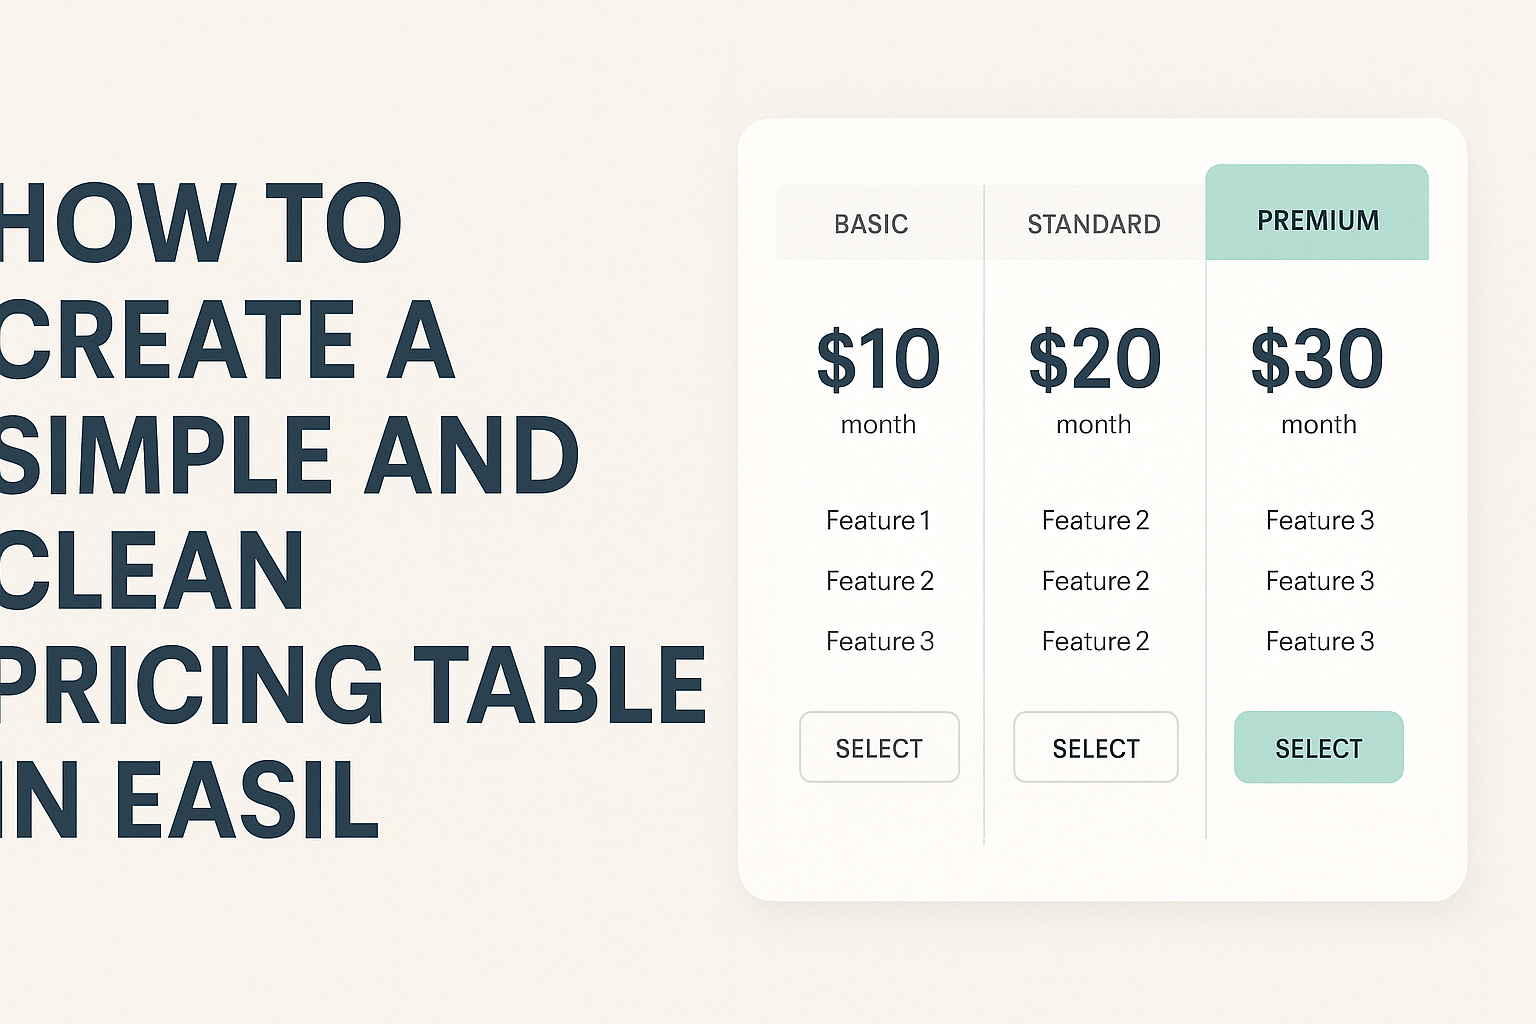
Key Elements of an Effective Table
An effective pricing table should include several important elements.
First, clear headings for each plan help to segregate the options. Each plan should showcase the price prominently to grab attention.
It’s also essential to highlight the features offered. Using bullet points can make this information easy to scan. Adding a standout feature, like a free trial or discounted pricing, can encourage users to choose that plan.
Using a clean design with ample white space will keep the table user-friendly. Lastly, including a call-to-action button for each plan will guide users to take the next step in the purchasing process.
Designing Your Table
Creating a simple and clean pricing table is all about making it easy for users to understand their options. Key elements to focus on include layout, color schemes, fonts, and the use of visual hierarchy. Each of these components plays a significant role in how customers perceive the pricing information.
Choosing a Layout
The layout of a pricing table should be straightforward and easy to follow. A common approach is to use a grid format, where each plan is contained in its own section. This helps users to compare options side by side.
It’s beneficial to use clear headings for each plan, along with a brief description of the features. The table should also highlight the most popular plan, perhaps with a different background color or a border.
Additionally, leave sufficient white space between each section. This avoids clutter and makes it easier for users to focus on each plan individually.
Selecting Colors and Fonts
Color choices significantly impact the user experience. A simple color palette that reflects the brand is ideal. Using contrasting colors for the text and background can improve readability.
It is often best to limit the color use to three or four shades to maintain a clean look. For fonts, a clear, sans-serif typeface is recommended. This typeface is easier to read on screens.
Consider using bold text for headings and important details like prices. This will draw attention and make crucial information stand out.
Incorporating Visual Hierarchy
Visual hierarchy guides users to the most important elements of the pricing table. To create this effect, vary the font sizes and weights. The price should be the most prominent feature, followed by the plan name and features.
Using icons can also help convey messages quickly. For example, checkmarks can indicate included features, while crosses can signify exclusions.
Additionally, grouping similar features together can enhance understanding. Users should quickly see what they’re getting and the differences between plans. This clear structure makes it easier for customers to make informed decisions.
Implementing Pricing Strategies
When creating a pricing table in Easil, specific strategies can enhance clarity and value. Two effective methods are using tiered pricing models and highlighting a recommended plan.
Tiered Pricing Models
Tiered pricing models allow businesses to offer different levels of service. This helps customers choose based on their needs. Typically, there are three to five tiers, with each level offering more features or benefits.
For example, a basic plan may include limited access, while a premium tier could provide full access and additional perks. This approach shows value at each level and encourages upgrades.
A simple table can illustrate these tiers clearly, helping customers make informed decisions. Visual representations make comparisons easier and enhance the overall user experience.
Highlighting a Recommended Plan
Highlighting a recommended plan can guide customers to the best choice. This strategy creates a focal point, making it easy for them to identify the option that delivers the most value.
Using bold graphics or a bordered box can draw attention to the selected plan. It helps in showcasing its benefits, like cost savings or superior features, which may appeal to potential buyers.
A brief description of why this plan is recommended can further support customer decisions. Clear language and appealing designs will lead customers toward the best choice with confidence.
Using Easil for Your Pricing Table
Easil is a user-friendly tool that simplifies the process of creating attractive pricing tables. It allows users to design professional-looking tables with ease, ensuring that key information stands out.
Getting Started with Easil
To begin designing a pricing table in Easil, users should first log in to their accounts. From the dashboard, they can select Add Graphic Elements and choose the Tables option. A variety of ready-made table templates will appear.
Users can select a layout that fits their needs and add it to their project.
Once the table is in place, they can personalize it by adding relevant details such as prices, features, and calls to action. Each cell can be edited directly by double-clicking, making it easy to input specific information. This simplicity allows for quick adjustments based on user preferences.
Customization Tips
Customization is key to making a pricing table stand out.
Users can change colors, fonts, and sizes to match their brand identity. Using bold text for headings can help highlight important features.
Adding icons or images next to key benefits can draw attention and make the table more engaging.
Each plan can be differentiated through color-coding or various styles. Users might also consider using a comparison style to visually separate different pricing options.
Incorporating white space around items helps avoid clutter and improves readability.
Easil provides the flexibility needed to tailor each table, ensuring it meets users’ unique requirements.