Retouching photos can make a big difference in their quality and appeal. Using Canva’s tools, anyone can enhance their images quickly and easily.
Whether it’s smoothing skin tones, removing blemishes, or adding a touch of creativity, Canva offers user-friendly options to transform photos with just a few clicks.
Many people may wonder how to get the most out of Canva’s photo editing features. This blog post will guide readers step-by-step through the retouching process, unlocking the secrets to making photos look their best.
With these practical tips, it becomes simple to create stunning visuals that stand out.
By the end of this article, readers will feel confident in their ability to retouch images like a pro. Discover how to use the retouch tools in Canva and turn ordinary photos into captivating images that catch the eye.
Getting Started with Canva
Canva provides users with an easy way to create and edit images.
Knowing how to create an account, navigate the interface, and choose the right template is a great start for anyone looking to enhance their photo editing skills.
Creating an Account
To utilize Canva, the first step is creating an account. Users can sign up using their email address, Google account, or Facebook profile.
After entering the required information, they receive a verification email.
Once verified, users can explore Canva’s features for free. They also have the option to upgrade to a Pro account for additional tools and templates.
It’s a straightforward process that opens the door to a wide range of design possibilities.
Navigating the Interface
After logging in, users will see Canva’s main dashboard. This area features a search bar for quickly finding designs and templates.
The left sidebar includes categories like “Templates,” “Elements,” and “Uploads” to help users find what they need.
The core editing area takes the center stage and is where most of the magic happens. Users can easily place, adjust, and manipulate images or text.
Overall, Canva’s layout is user-friendly, making it accessible for everyone, whether they are beginners or experienced designers.
Selecting the Right Template
Choosing the right template is crucial for creating appealing designs. Canva offers a variety of templates for different purposes, such as social media posts, presentations, and flyers.
Users can browse through these categories or use the search function to find something specific.
Once a template is selected, it can be customized with personal images, colors, and fonts. This flexibility allows users to create unique designs that reflect their styles.
With so many options, selecting a template that fits the intended message or theme is essential for effective design.
Basic Photo Retouching Techniques
Photo retouching can significantly enhance the quality of images. By focusing on cropping, resizing, brightness, and contrast, users can improve their photos effectively.
Cropping and Resizing
Cropping and resizing photos is one of the first steps in retouching. This technique allows users to remove unwanted parts of an image and improve its composition.
To crop a photo in Canva, users can select the image and choose the “Crop” tool. They can then adjust the borders to focus on the main subject.
Resizing is also easy. By dragging the corners of the image, users can make it smaller or larger, fitting it perfectly within their design layout.
Maintaining the aspect ratio is essential. Users should hold the Shift key while resizing to keep the proportions accurate. This ensures that images do not appear stretched or squished.
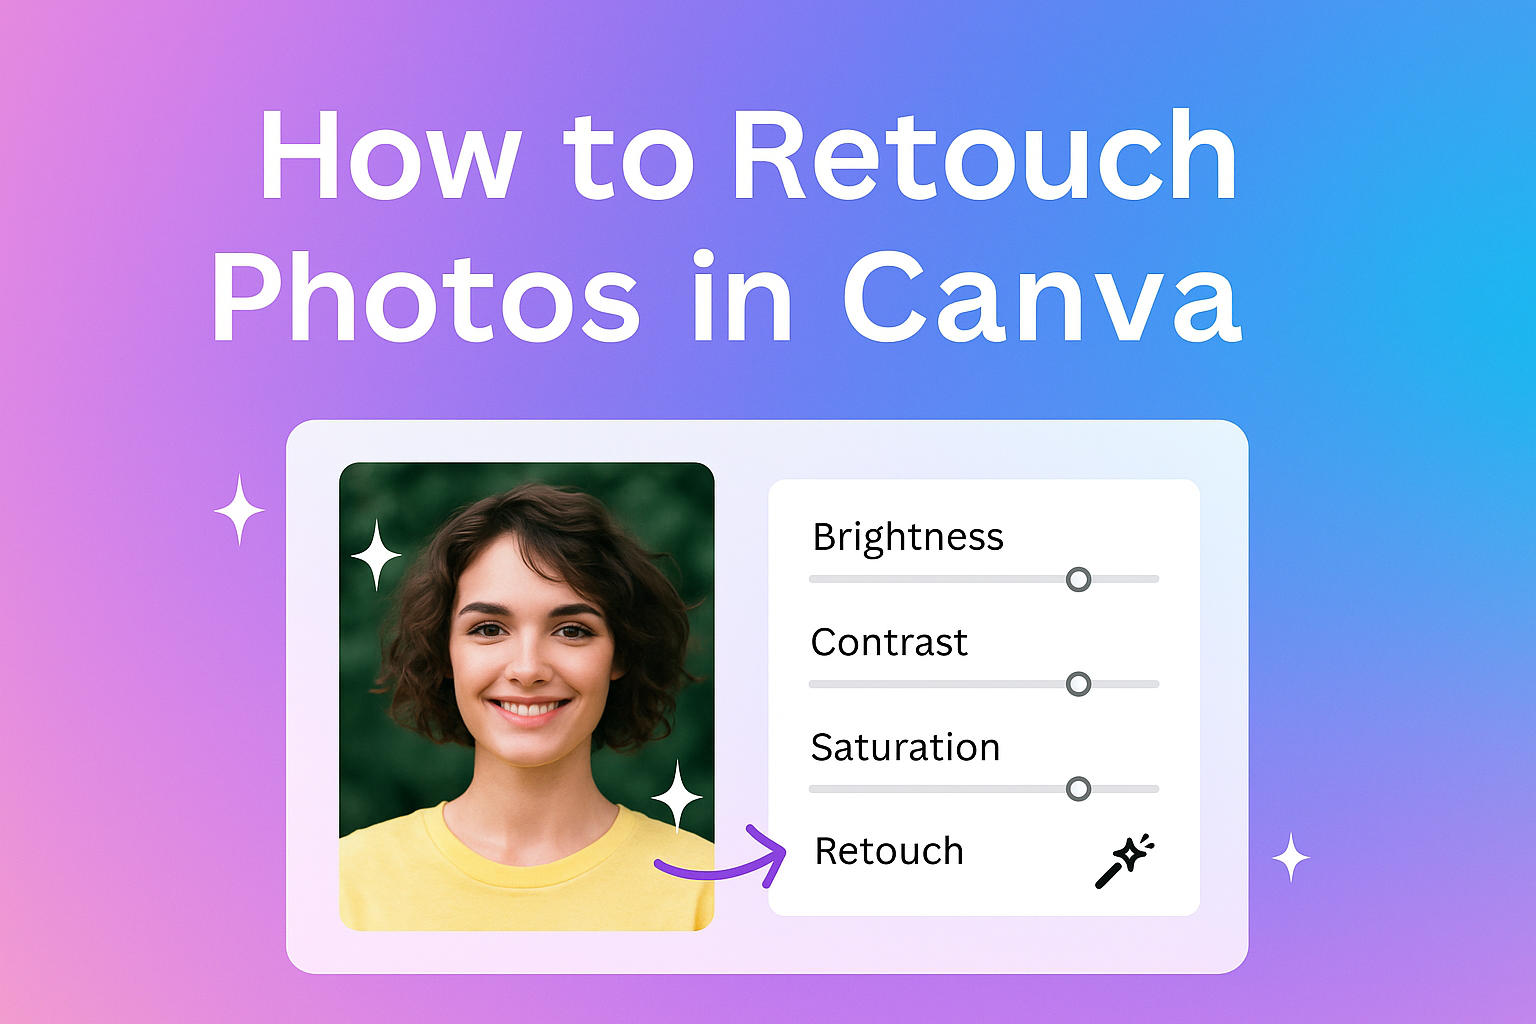
Adjusting Brightness and Contrast
Adjusting brightness and contrast can give photos a more vibrant look. This technique helps to make the details stand out clearly.
In Canva, users can click on the “Edit photo” option after selecting their image.
Under the “Adjust” tab, there are sliders for brightness and contrast.
Moving the brightness slider to the right makes the image lighter, while moving it to the left darkens it.
The contrast slider adjusts the difference between the light and dark areas. Increasing contrast enhances the photo’s depth.
It’s important for users to preview changes in real time. This way, they can ensure their adjustments enhance the image without making it look unnatural.
Advanced Editing Tools
Canva offers powerful editing tools that make enhancing photos easy and creative. Two key areas include working with filters and effects, as well as adding text and stickers to images. Each of these tools can significantly elevate a design and make it stand out.
Working with Filters and Effects
Filters and effects can dramatically change the mood of a photo. Canva provides a range of preset filters that users can apply with a single click.
To access these, she should click on the “Edit image” button.
Once there, she can choose from various filter options. Adjusting the intensity of these filters allows for finer control.
Effects like brightness, contrast, and saturation can also be modified using sliders.
This helps to achieve the desired look. Experimenting with combinations can lead to unique results.
Using filters wisely can highlight specific aspects of an image.
Utilizing Text and Stickers
Adding text and stickers is a fun way to personalize photos. Canva has a library full of fonts and graphics that she can use.
To add text, simply click on the text tool and type the desired message.
Choosing the right font and color is important for visibility. For stickers, Canva offers a variety of shapes and illustrations that enhance visuals.
She can drag and drop these elements onto her photo and resize or rotate them as needed.
Layering different text styles and stickers can create a dynamic look. This is a great way to give images a personal touch or to convey messages clearly.
Exporting and Sharing Your Work
After editing photos in Canva, it’s time to share the finished product.
Exporting is simple and quick. To export an image, follow these steps:
- Click on the Download button in the top right corner.
- Choose your preferred file type, such as PNG, JPG, or PDF.
- Adjust any settings that appear based on the selected format.
Canva will then prepare the file for download. Users can see the progress and know when the file is ready.
Sharing is just as easy. Canva provides options to directly share work via social media, email, or a link.
Users can follow these steps:
- Click the Share button next to the Download option.
- Choose between sharing on platforms like Facebook or Twitter.
- For email, enter the recipient’s address and add a message if desired.
Additionally, Canva allows users to collaborate on projects. To share editable links:
- Click on Share.
- Select “Anyone with the link” and decide if they can edit or only view.